Updating the project (design estimate creation process)
Last updated: 2026-02-04
After initial system log on and selecting the Designer role, designers should begin the design estimate creation process. The first step is to update the Project Summary component with basic required project information.
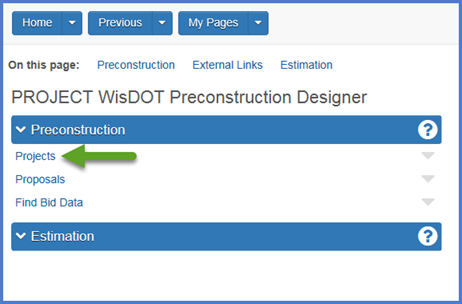
- Select the Projects hyperlink from the dashboard.

- Select the project on the Project Overview component.Tips:
Go to How to Search for the Contract ID by Project ID if only an associated project ID is known.
-
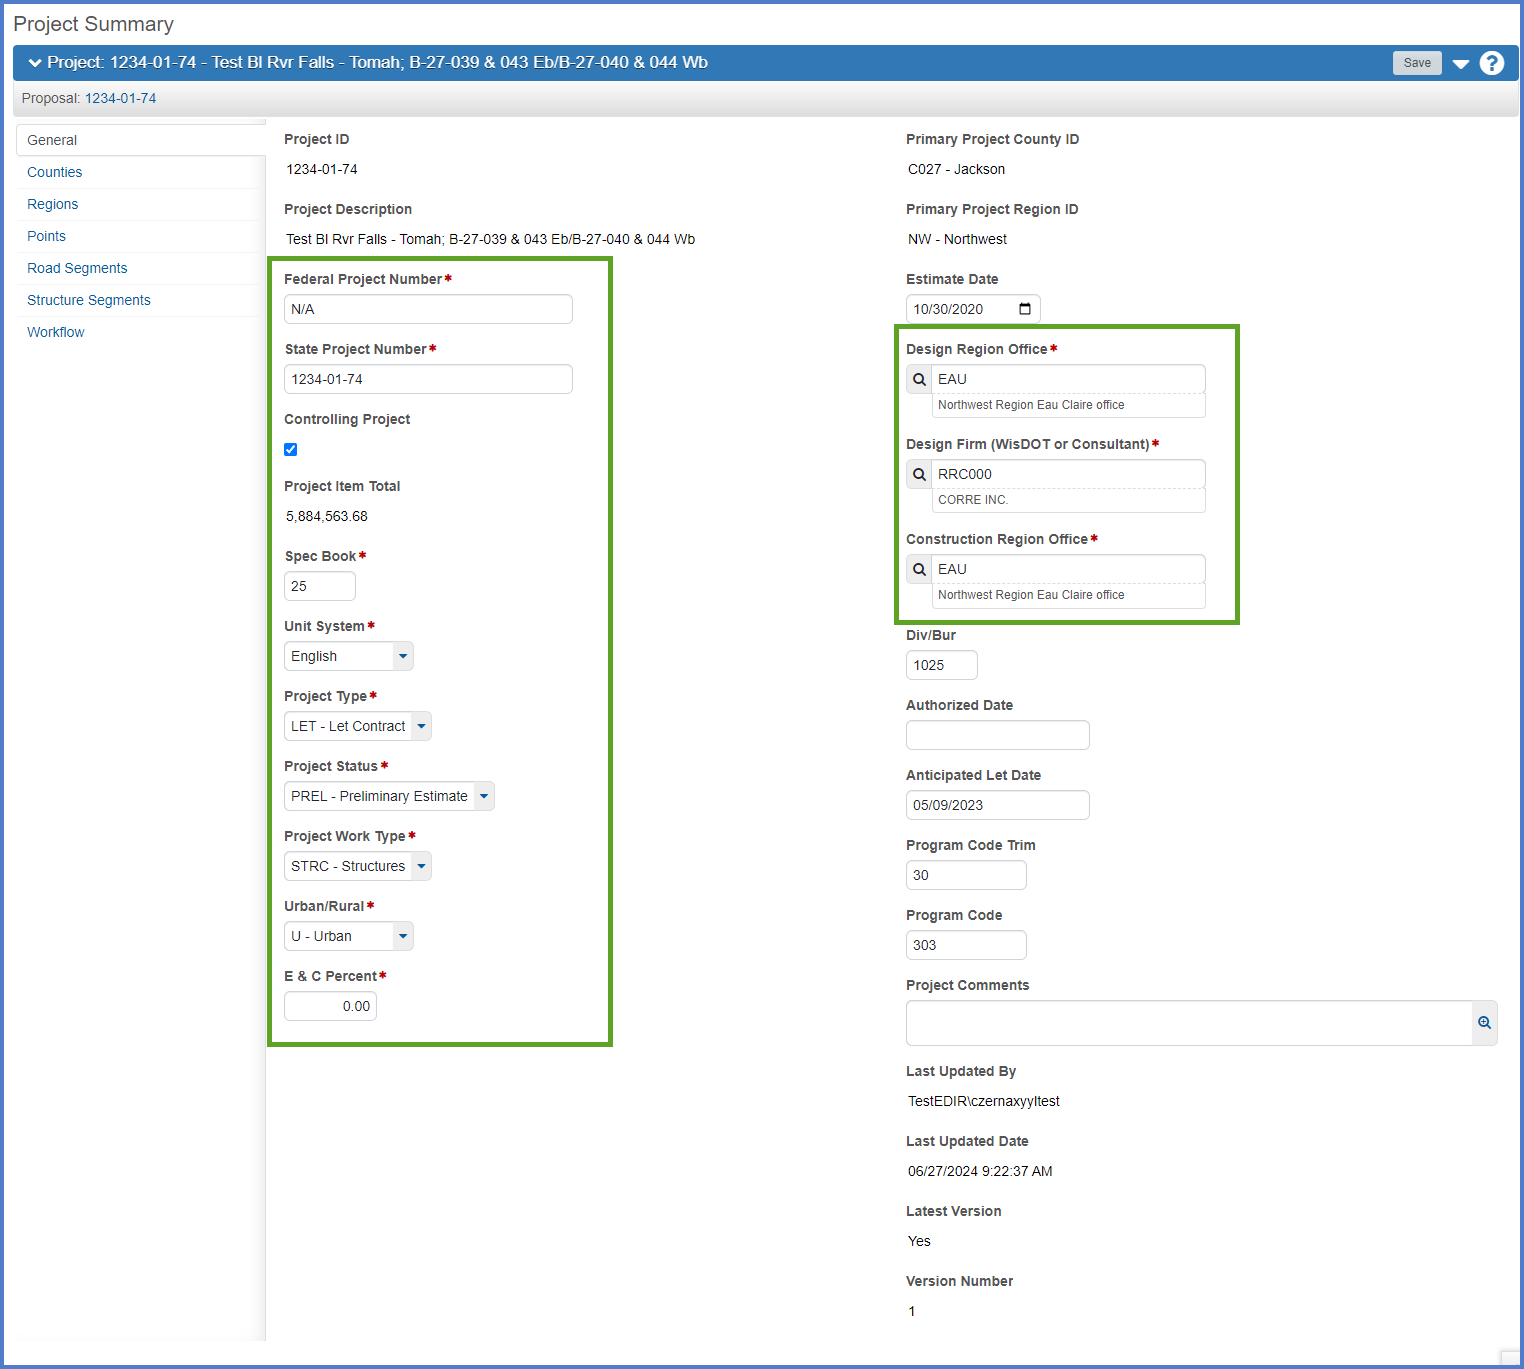
The Project Summary component General tab will appear. Enter the required fields using the field tool tips or the Project Summary Data Fields Table for guidance. Confirm the data entered is correct. It MUST match the project information in the Financial Integrated Improvement Programming System (FIIPS) with the exception of case. If you do not have access to FIIPS, contact your project manager for the FIIPs information for your project(s).
-
The designer should review and update the following fields on the Project Summary General tab using the field tool tips or the Project Summary Data Fields Table for guidance. Click <Save> when the updates are complete.
- Federal Project Number and State Project Number
- Select the Controlling Project checkbox if this is the controlling project for the proposal.
- Spec Book - The Spec Book is necessary for connecting to the item and bid history data in Estimator. Starting with Spec Book Version 2025, enter the year of the Spec Book that the project will be constructed under. For example, if the project is being constructed under the 2025 Spec Book, enter “25”.
- Project Type, Project Status, Project Work Type
- Urban/Rural, E&C Percent
- Design Region Office, Design Firm, Construction Region Office
- Click <Save>.

- The Designer Region Office and Construction Region Office fields should match the information found in the Plan Letter. See FDM 19-10-15 for more details.
- When searching for a project engineer's design firm and they do not appear in the list, have the vendor log into the WisDOT Vendor Registration System (VRS) using their WAMS ID. They need to complete the following steps:
- Search for an existing vendor to determine if their vendor record exists and needs to be updated.
- If an existing vendor record is not found, they will need to Register as a new vendor.
- The VRS Agency Admins review and approve all requests. Once approved, VRS information will be synced immediately withthe associated vendor record in AASHTOWare Project. Designers will be able to locate the vendor within their project and add them as the design firm as soon as this process is complete.
- Contact an AASHTOWare Project System Administrator at the AWP Support mailbox for assistance.
-
Throughout the AWP Preconstruction application, PS&E is referenced as PSE. The AASHTOWare Project application does not recognize some special characters including the “&” sign. Occasionally when referencing a PS&E process within the application, PSE will be used instead in this documentation.
Go to Setting the initial WisDOT Workflow to the Project Definition Phase, the next step under Creating an Estimate in Preconstruction.