Items
Last updated: 2022-01-03
Items are added and associated with a category based on the type of work to be done on the project. Items can be added to a project in several different ways. They can also be edited, copied or deleted under the Item Component tab. This section describes several ways to add items to a project in AASHTOWare Project Preconstruction.
- Select the Categories and Items quick link near the top of the screen to edit, copy, or delete items. Select the Items component tab. Items entered previously in Estimator will appear.
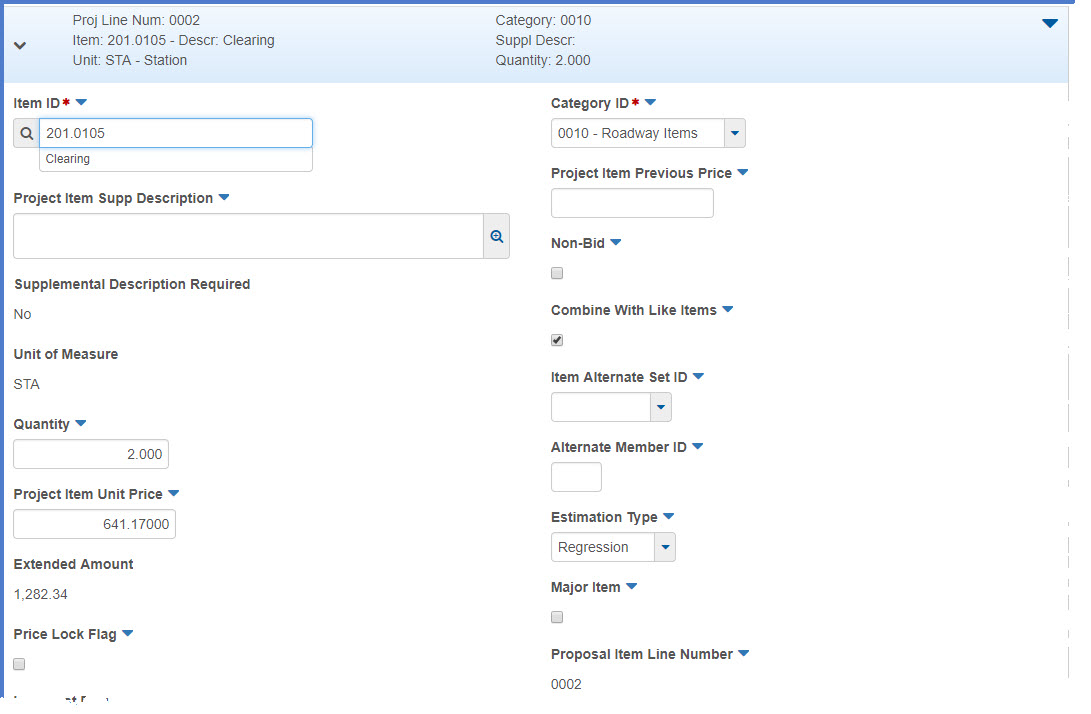
- To edit an existing item:
- Click the Expand/Collapse button on the left side of the item to view the item’s detail. Refer to the Item Data Fields Table for guidance on how to complete the required data fields. Required fields include Item ID, Quantity, Project Item Unit Price, Category ID, and possibly the Supplemental Description.
Click <Save>.

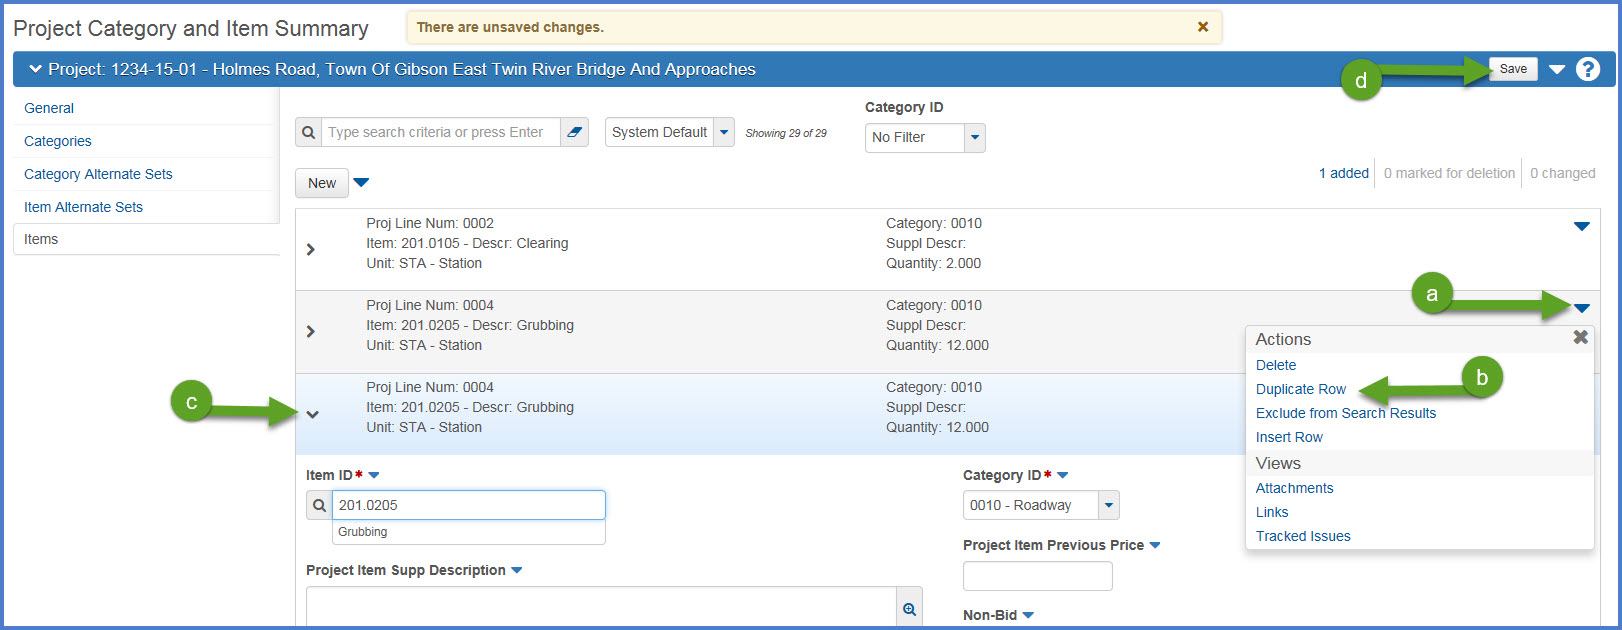
- To copy (duplicate) an item:
- Click the item actions button on the right side of the item row.
- Select "Duplicate Row".
- A copy of the item will be created below the original item and the row expanded. Refer to the Item Data Fields Table for guidance on how to complete the required data fields.
- Click <Save>.
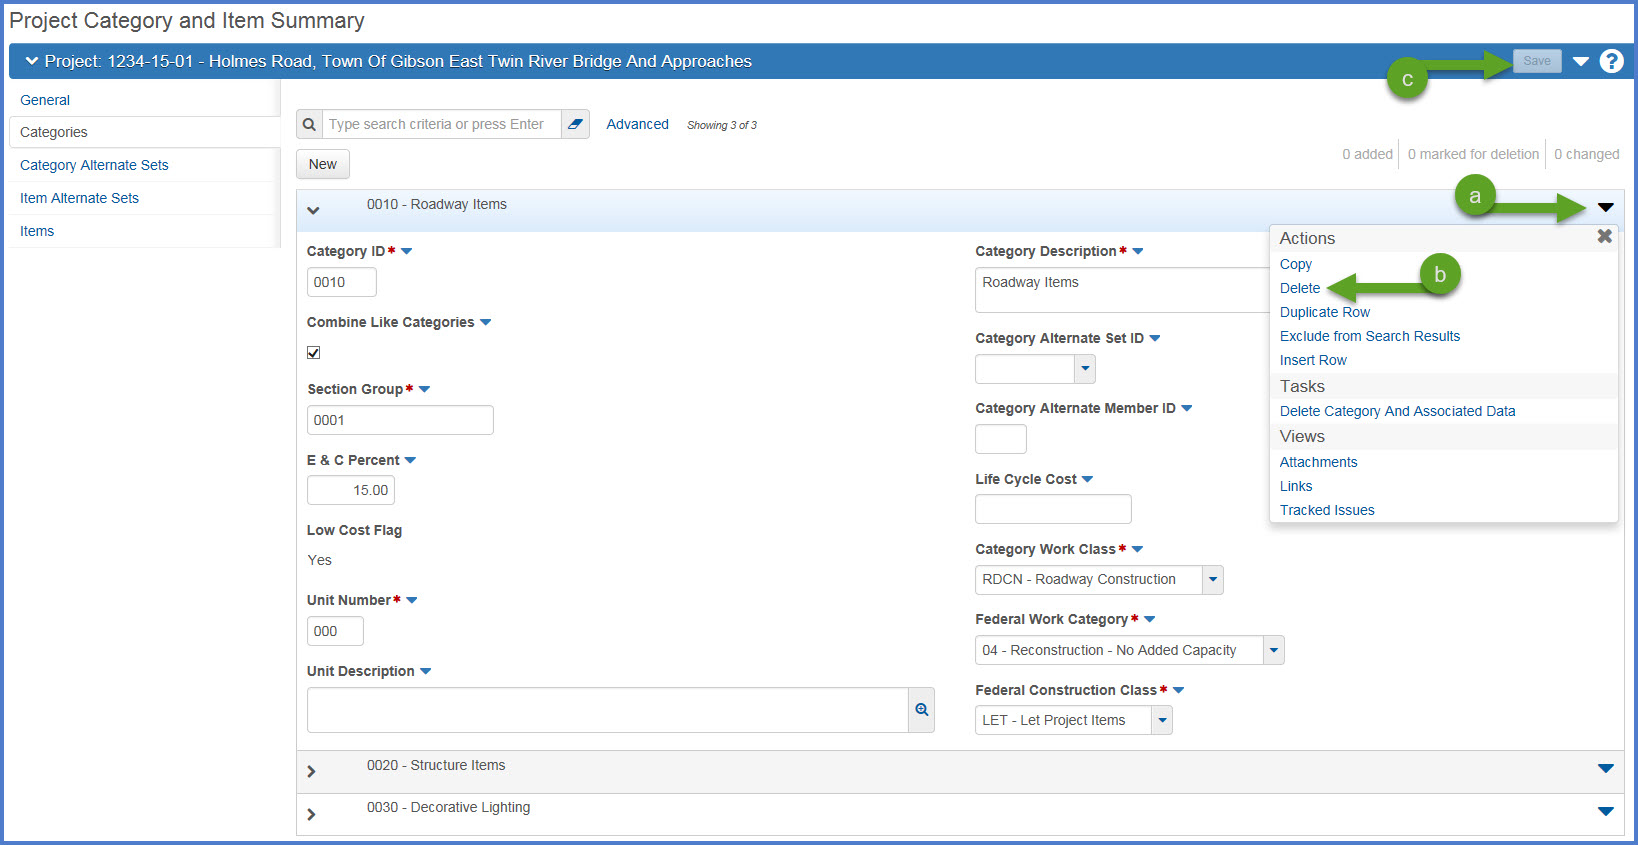
- To delete an item:
- Click the item actions button on the right side of the item row.
- Select "Delete". The item will be marked for removal from the project.
- Click <Save> to confirm changes.
Warnings:After deleting one or more item(s) from a project associated to a proposal, the leading zeros for all proposal line numbers are removed (e.g. 0002 = 2, 0004 = 4, etc.). The developer, InfoTech, is aware of this issue but does not have a patch at this time. Here is the workaround until a patch is developed, if you find a project associated to a proposal that has invalid proposal line numbers.
- From the project item worksheet or project item list, edit a field within an item (e.g. change the item quantity by 1).
- Click <Save> to save changes.
- Edit the same item, reverting it back to its original value (e.g. item quantity).
- Click <Save> to save changes.
The proposal line numbers will now reflect the leading 0's.
- At the top of the Item list, click <New>.
Tip: New items are placed at the bottom of the item list. Use the <Back to Top> scroll button to return to the top of the page quickly.

- At the bottom of the component window, an expanded row will open titled “New Project Item”. Refer to the Item Data Fields Table for guidance on how to complete the required data fields. Required fields include Item ID, Quantity, Project Item Unit Price, Category ID, and possibly the Supplemental Description.
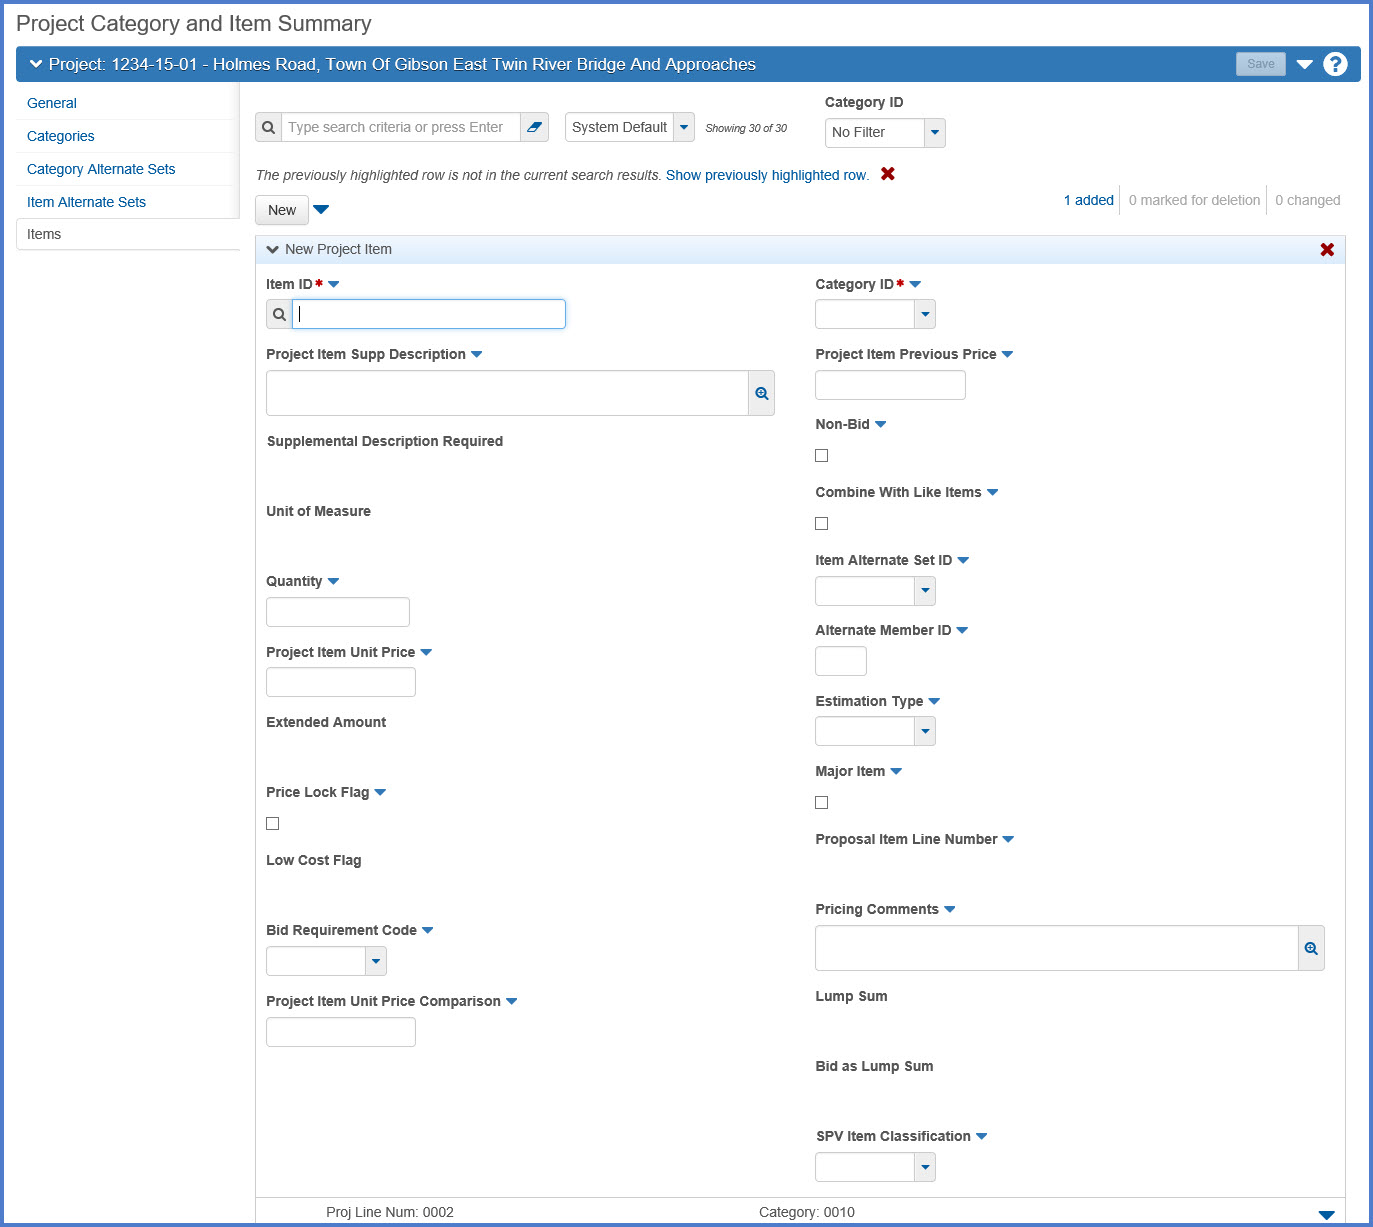
- Click <Save>.
Info: Once the new item is saved, the items will be reordered by item ID and supplemental description within each category.
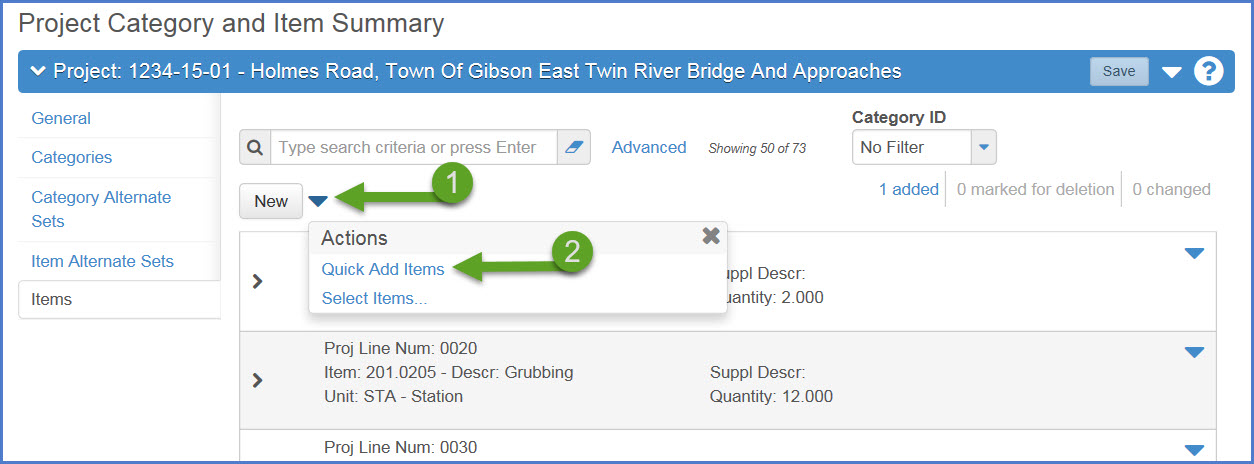
- Click the new item action button.
- Select "Quick Add Items".
- Refer to the Item Data Fields Table for guidance on how to complete the required data fields that appear on this screen.
- Cat ID - Select a category from the drop-down list.
- Item - Select an item from the drop-down list.
- Quantity - Enter item quantity.
- Price - Enter item price.
- Suppl Descr - Enter a supplemental description, if required.
- Tab off the Suppl Descr field or click <New> to add additional items and complete the fields following the instructions noted above.
- Click <Save> at the top of Add Project Items component when complete.

Info: Once the new item is saved, the items will be reordered by item ID and supplemental description within each category.
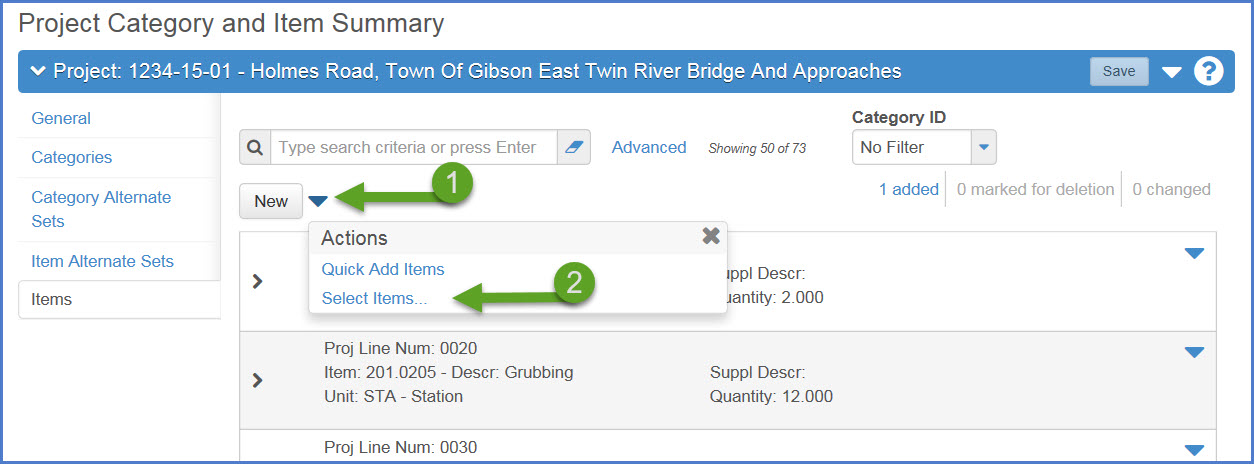
- Click the new item action button.
- Select "Select Items".
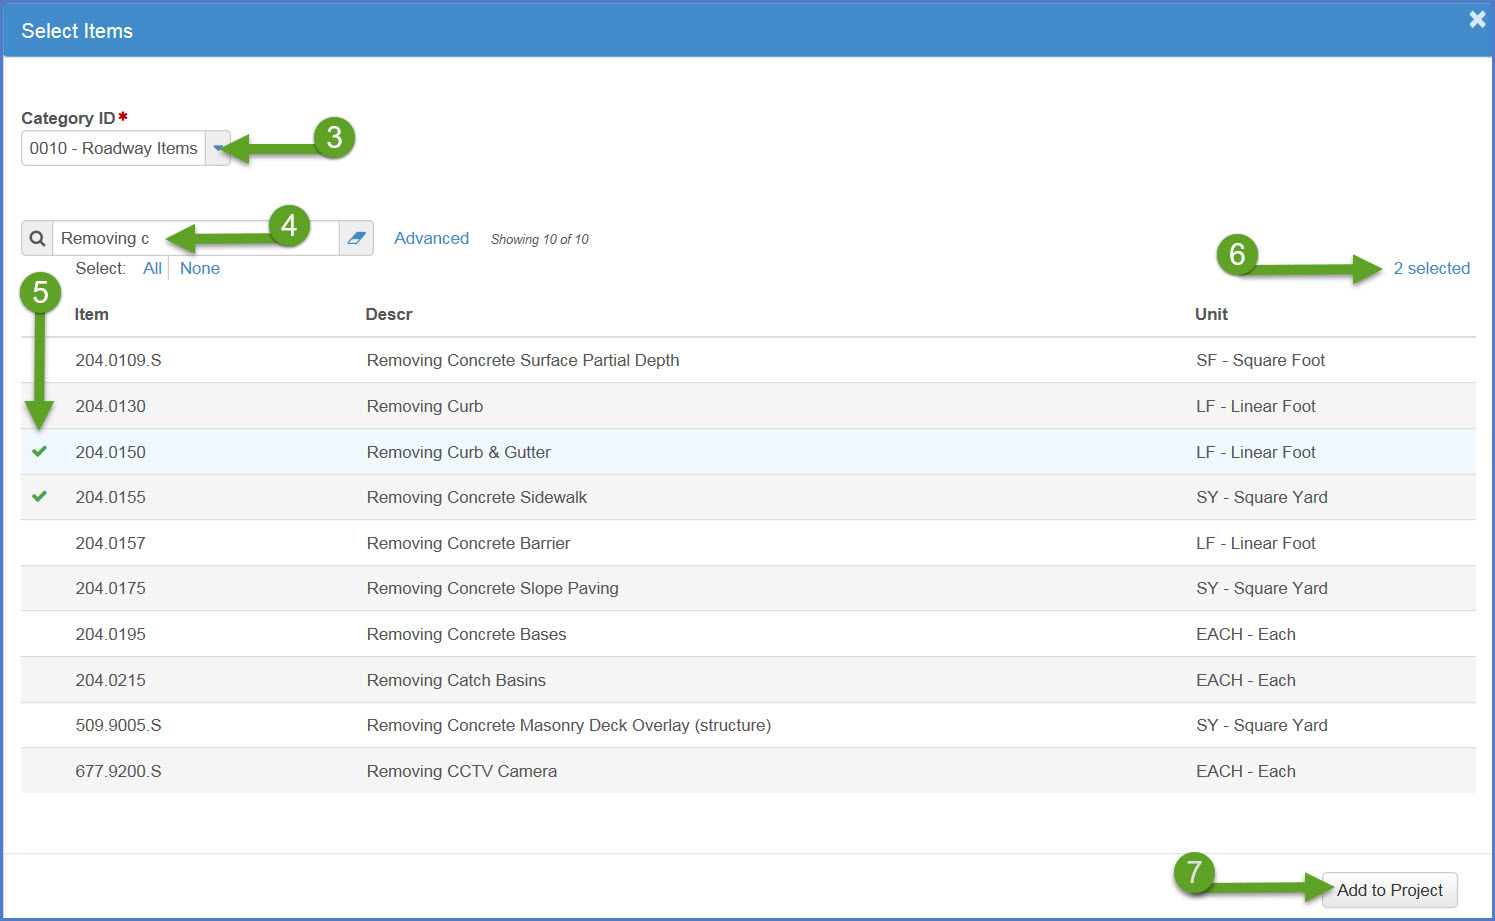
- Select a Category ID from the drop-down list.
- Search for specific items by item ID or item description.
Tip: Depending upon the search criteria, more items can be displayed by selecting "Load next 50" at the bottom of the screen.
- Select 1 or more items to associate to the chosen category for this project by clicking in front of the Item number. Items to be added will be noted with a green checkmark.
- The total number of selected items is shown on the upper right side of the screen.
Info: Multiple searches with multiple selections can be made. The system will keep track of all selected items.
- Click <Add to Project> to add these items.
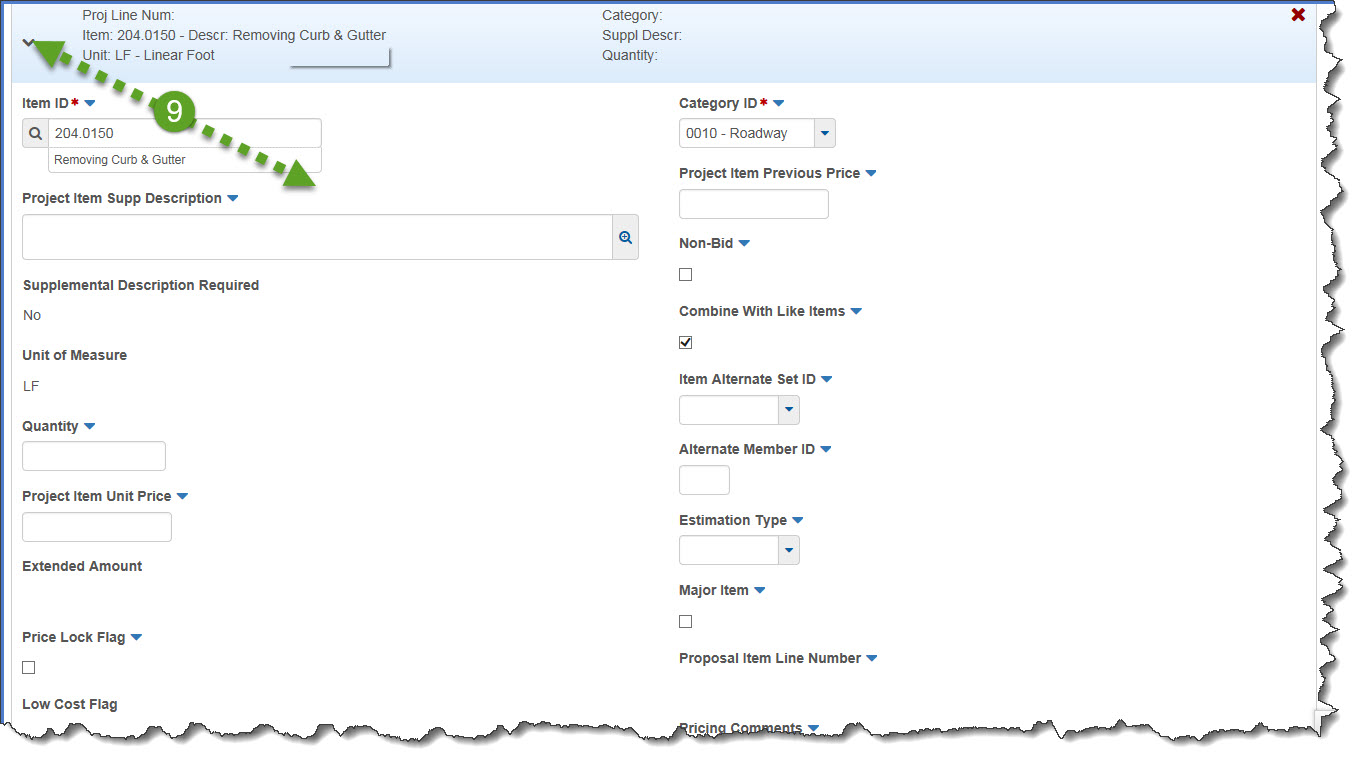
- The new items will appear at the bottom of the item list screen.
Tip: New items are placed at the bottom of the item list. Use the <Back to Top> scroll button to return to the top of the page quickly.

- Expand the item row by clicking the arrow. Refer to the Item Data Fields Table for guidance on how to complete the required data fields. Repeat for each new item.
- Click <Save> at the top of the Items component when complete.
Info: Once the new items are saved, the items will be reordered by item ID and supplemental description within each category.
Go to Project Item Worksheet for an additional way to add, edit or delete items from a project.
Go to Item Pricing, the next step under Creating an Estimate in Preconstruction.