Project Item Worksheet
Last updated: 2026-02-04
The Project Item Worksheet lists all the items in the project and provides a spreadsheet view to add, edit, or delete item information.
Within the project, select the Item Worksheet quick link to complete the following tasks in a view that is similar to an Excel spreadsheet. Designers can use this view to update project item fields including the category, item ID, supplemental description, quantity and price. Double click on each field value to edit.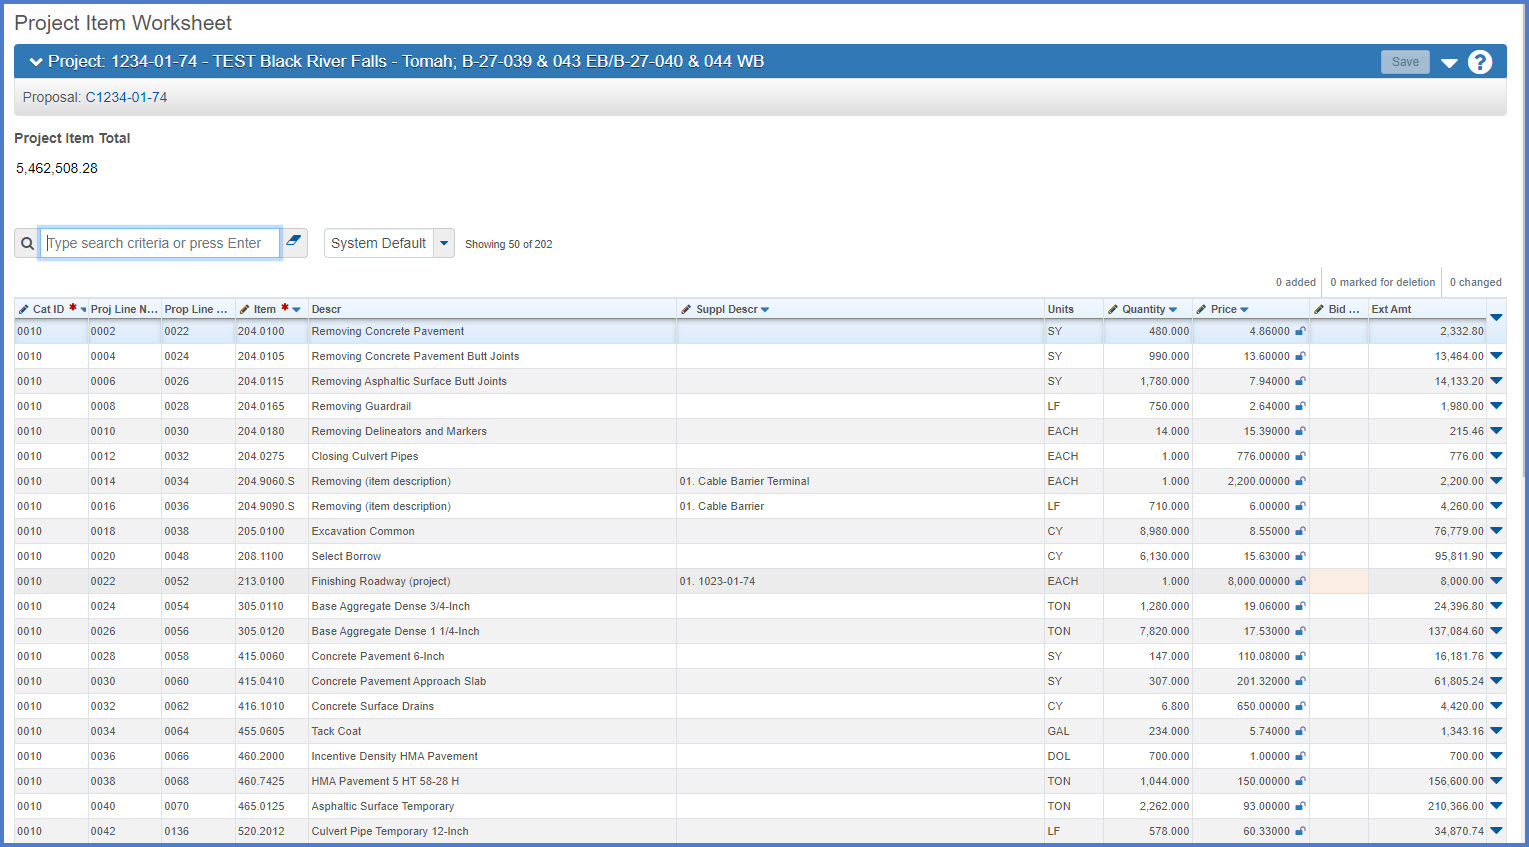
Info: Once the items are saved, they will be reordered by item ID and supplemental description within each category. Items are automatically renumbered when additions are made and saved.
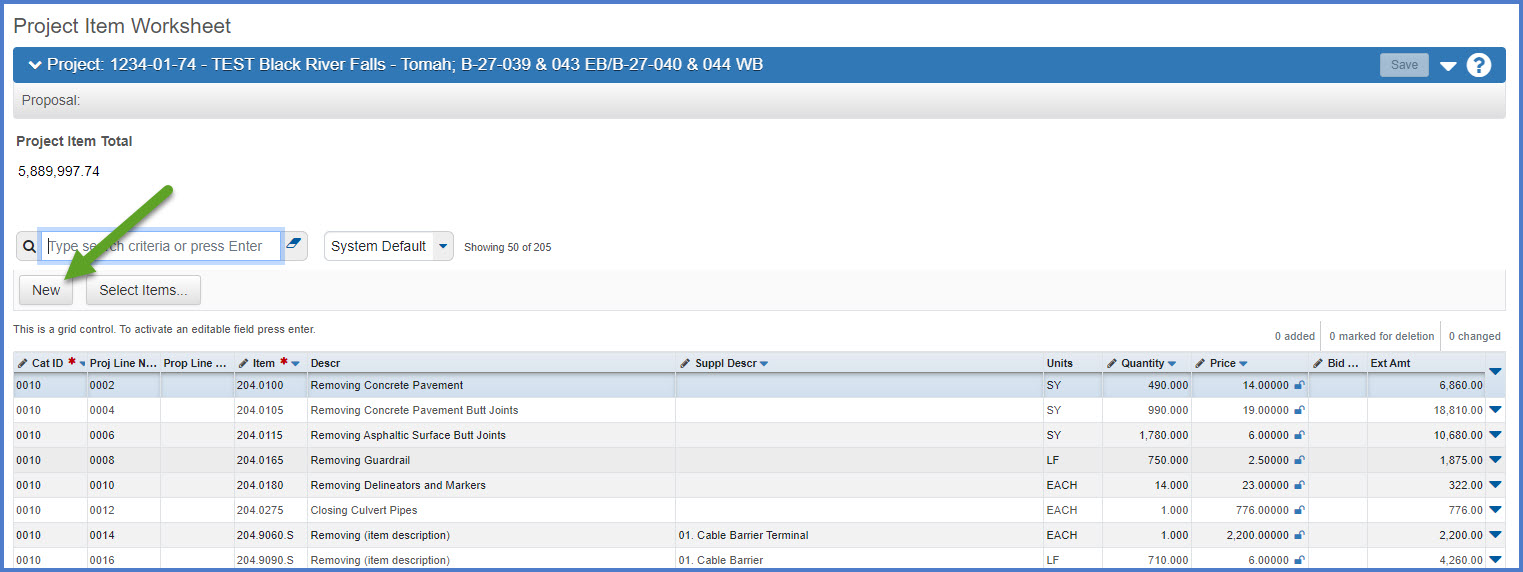
- Click <New>. A new item row will appear at the bottom of the worksheet.
- Enter the required fields referring to the Item Data Fields table and the Category Data Fields tables for guidance. Click <Enter> or double click on each field to open it for data entry.
- Click <Save>.

OR
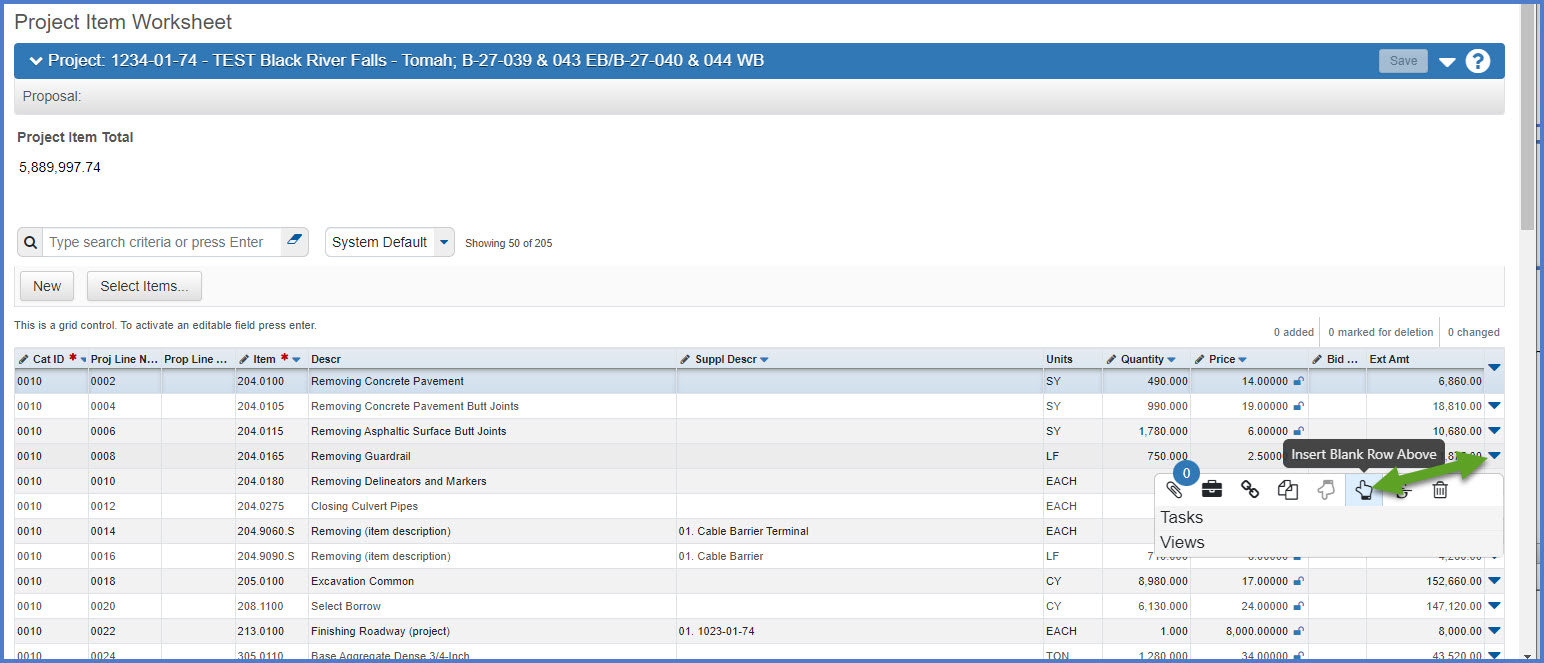
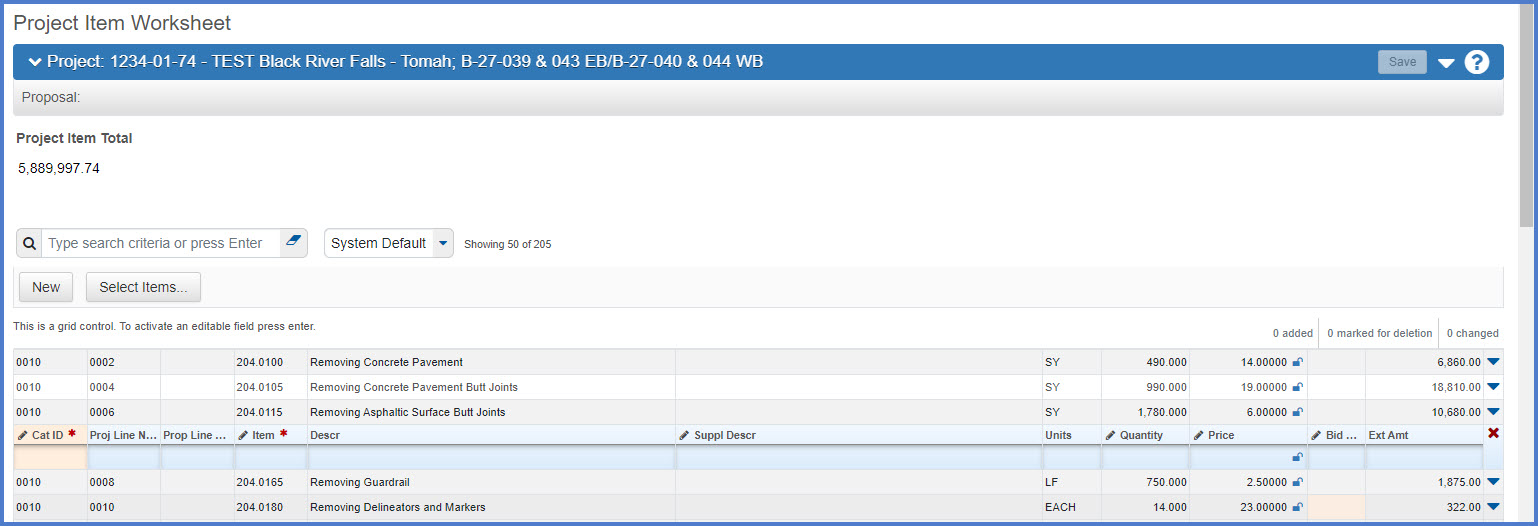
- Insert a new item row by selecting the row below where you want to insert the item. Select Open Row Actions menu | Insert Blank Row Above icon.
- Enter the required fields referring to the Item Data Fields table and the Category Data Fields tables for guidance. Click <Enter> or double click on each field to open it for data entry.
- Click <Save>.
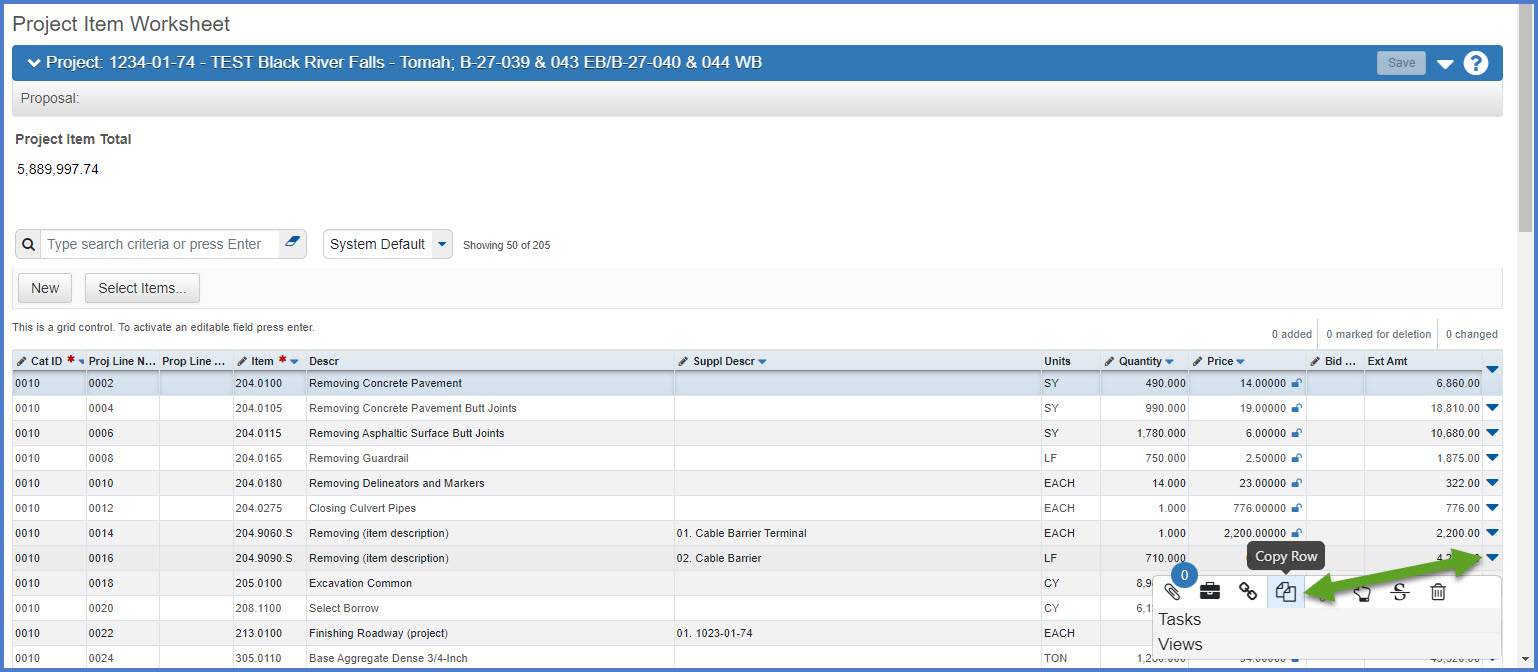
- Select the item row to copy.
- Select Open Row Actions menu | Copy Row icon.
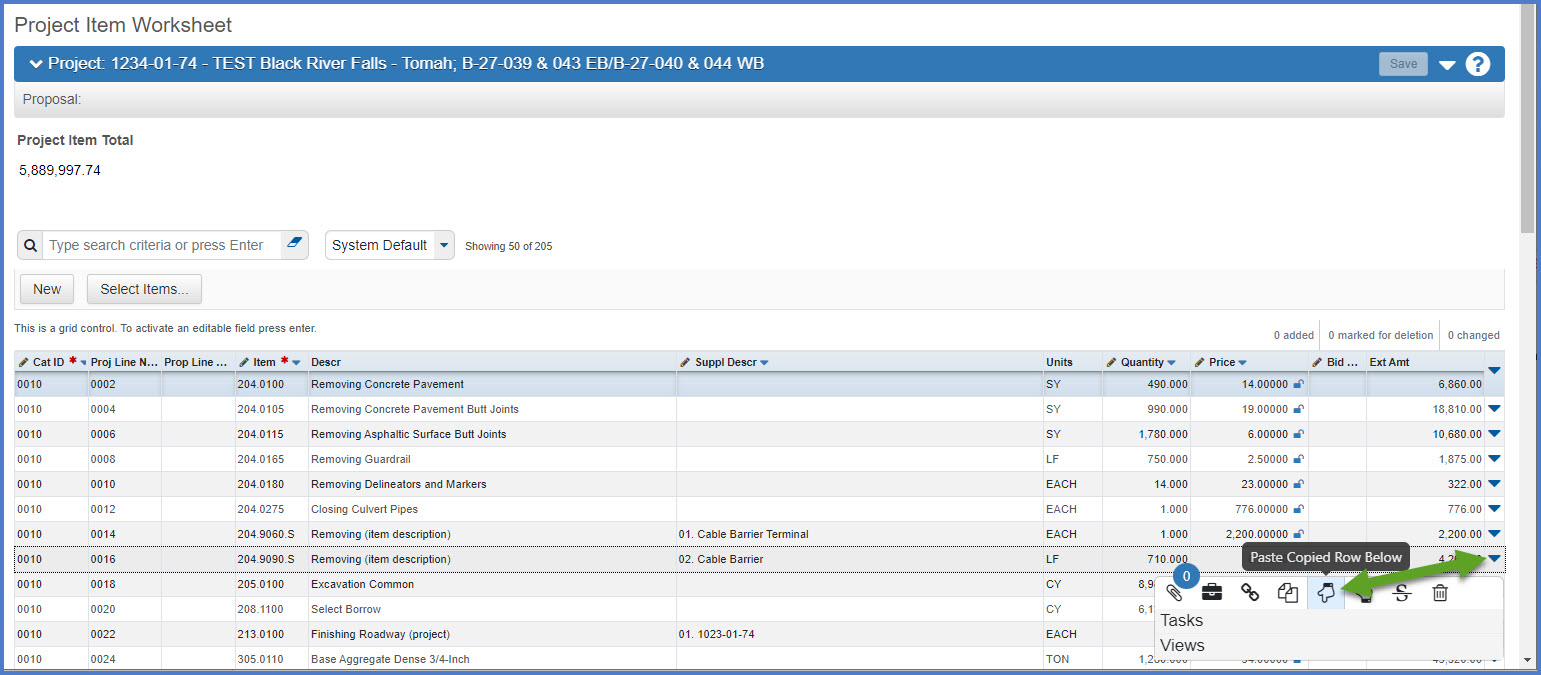
- Select Open Row Actions menu | Paste Copied Row Below icon.
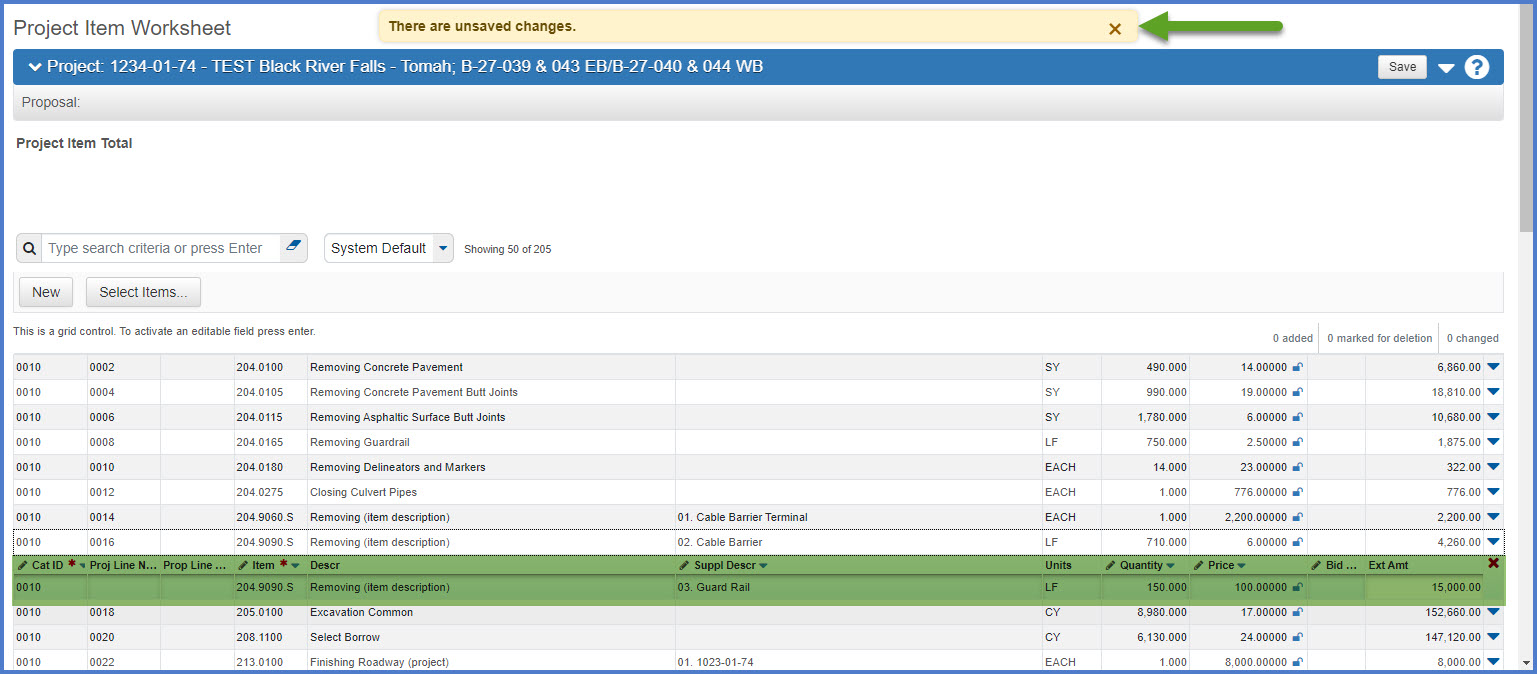
- Update the required fields referring to the Item Data Fields table and the Category Data Fields tables for guidance. Click <Enter> or double click on each field to open it for data entry.
- Click <Save>.
- Click <Select Items…> at the top of the Project Item Worksheet.

- Enter the Category ID for all the items being added to the project.
- Search by item ID or other criteria to narrow down the list of items. An advanced filter is also an option.
- Click the row for each item to be added. This will place a green checkmark in front of the item(s) to be added to the project.
- The total number of selected items is shown on the upper right side of the screen. Repeat steps 3-4 to select additional items.
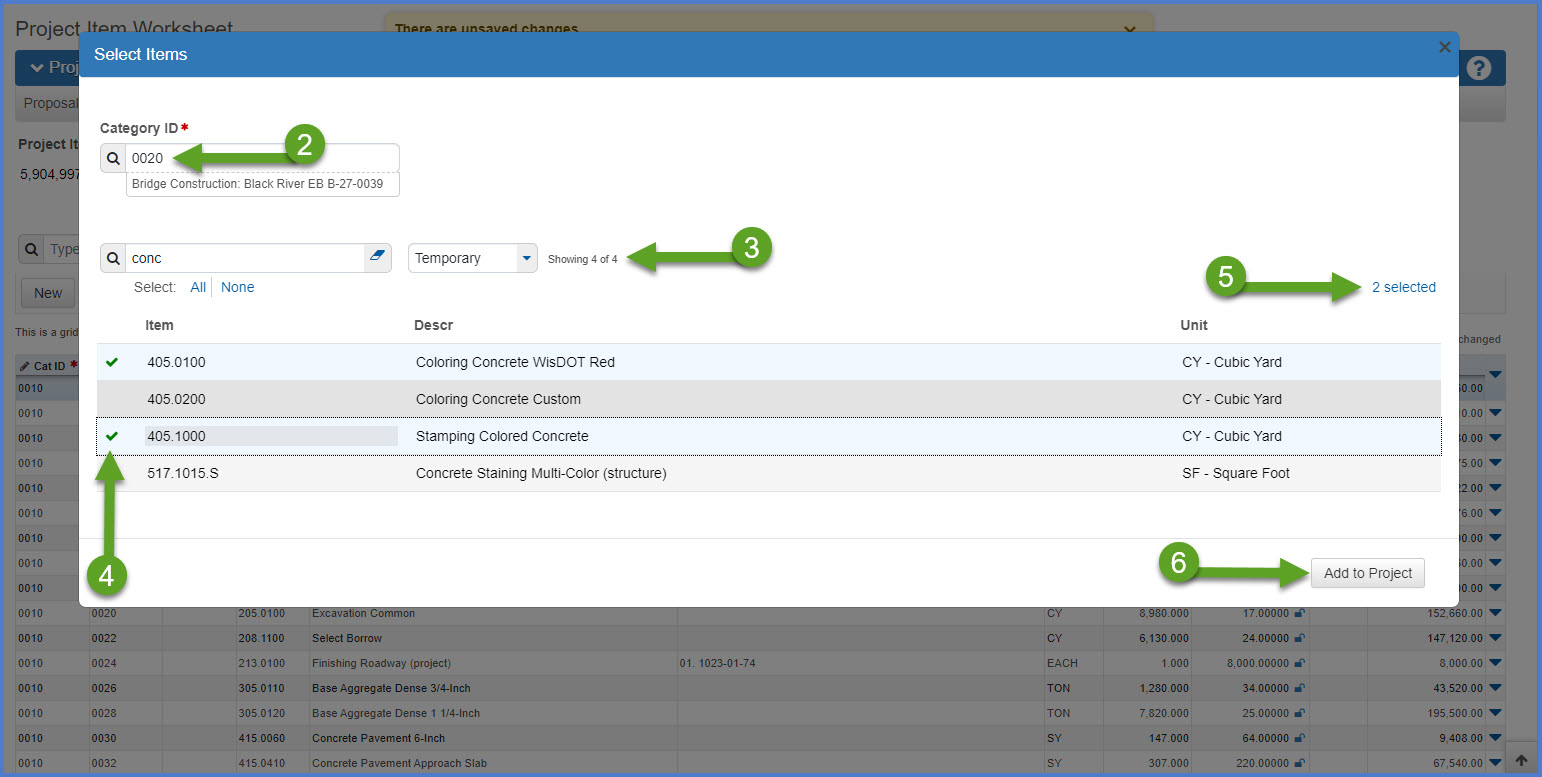
- After all items to be added are selected, click <Add to Project>.
- The items will appear at the bottom of the Project Item Worksheet.
- Enter the required fields referring to the Item Data Fields table and the Category Data Fields tables for guidance. Click <Enter> or double click on each field to open it for data entry.
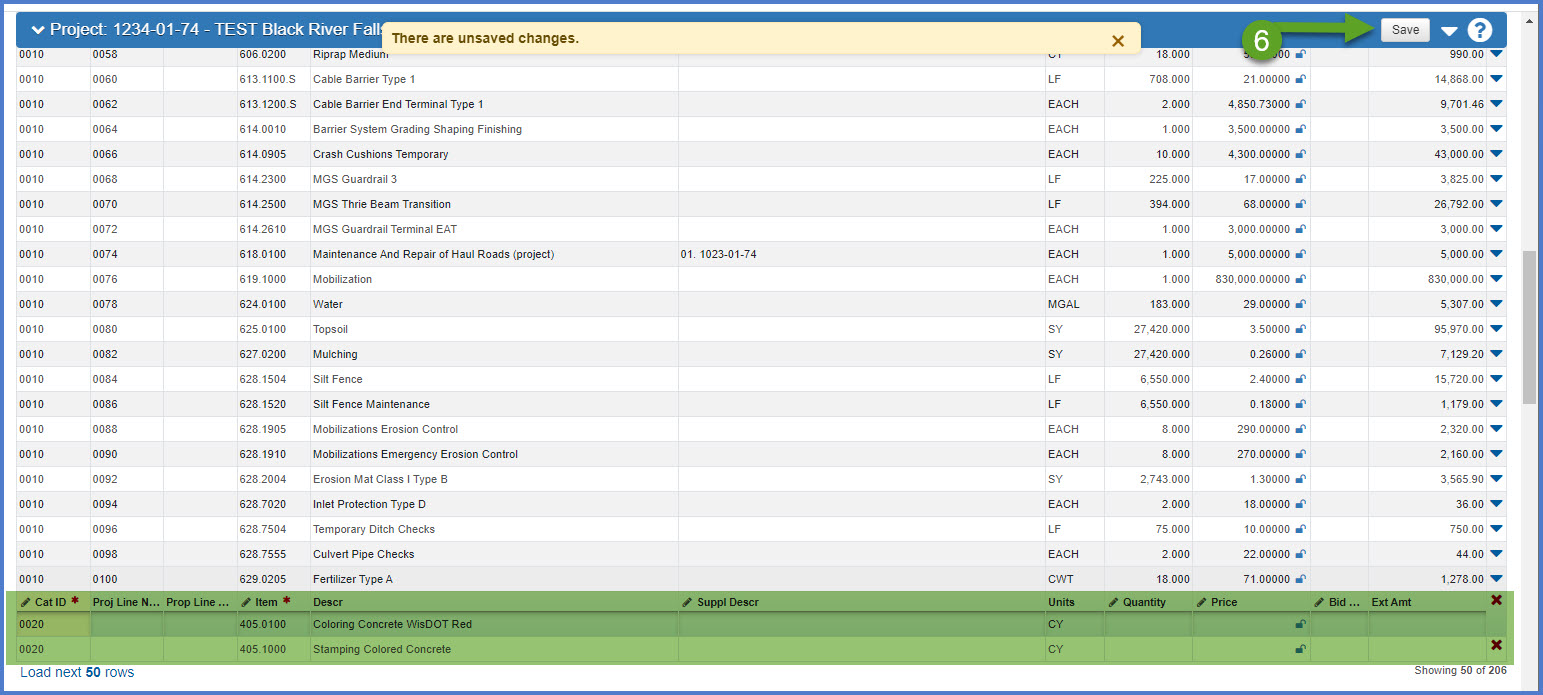
- Click <Save>. The items will be added to the project / category and assigned a Project Item Line Number by the system upon save.

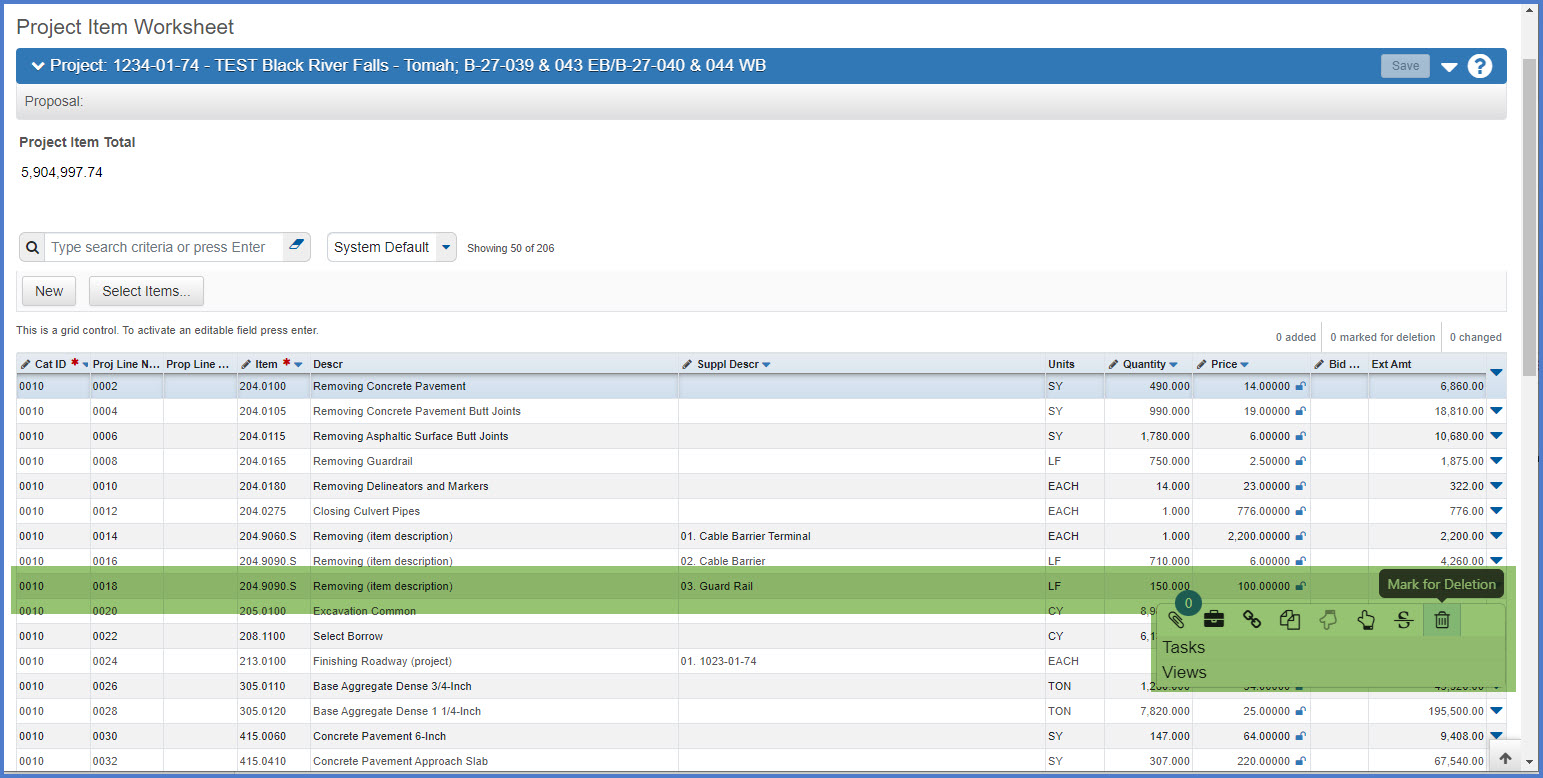
- Select the item row to delete.
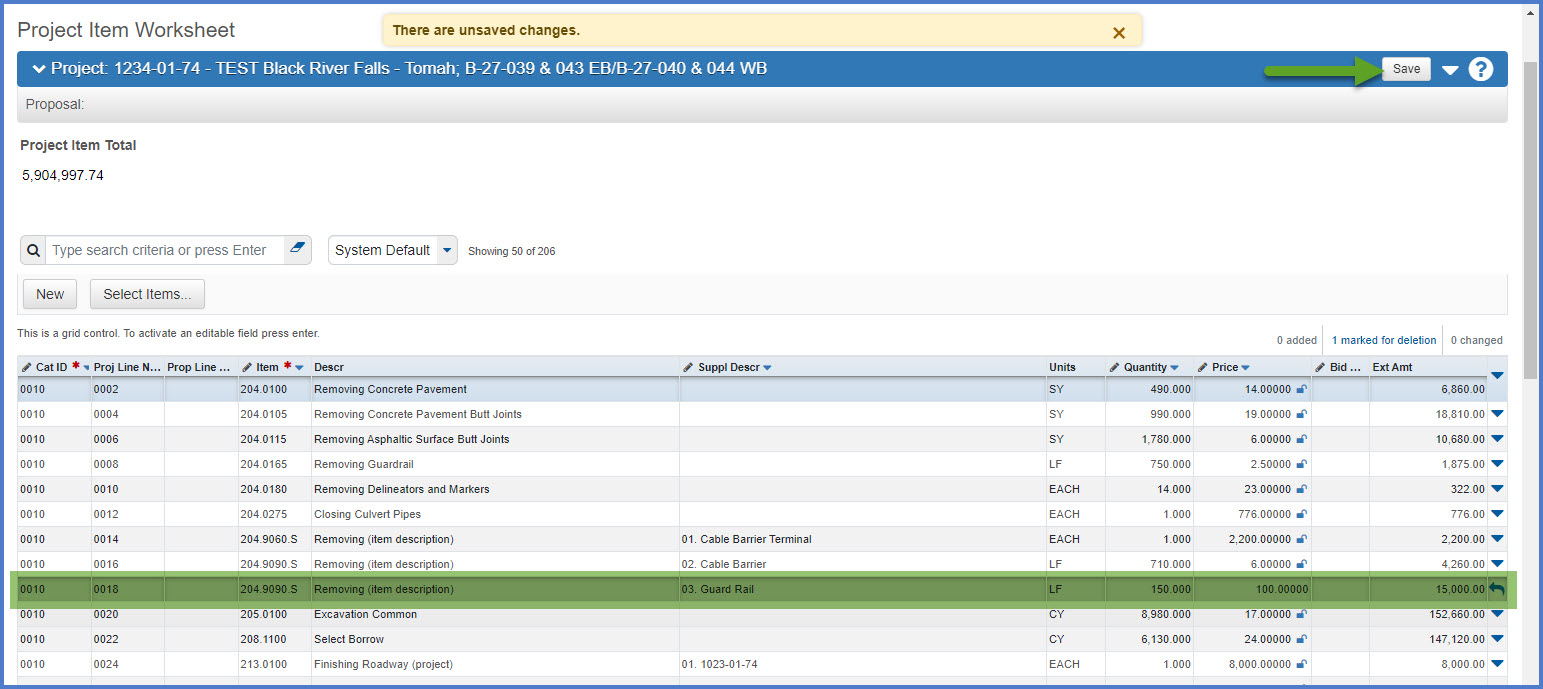
- Select Open Row Actions menu | Delete icon to mark the item for deletion.
- Click <Save>.
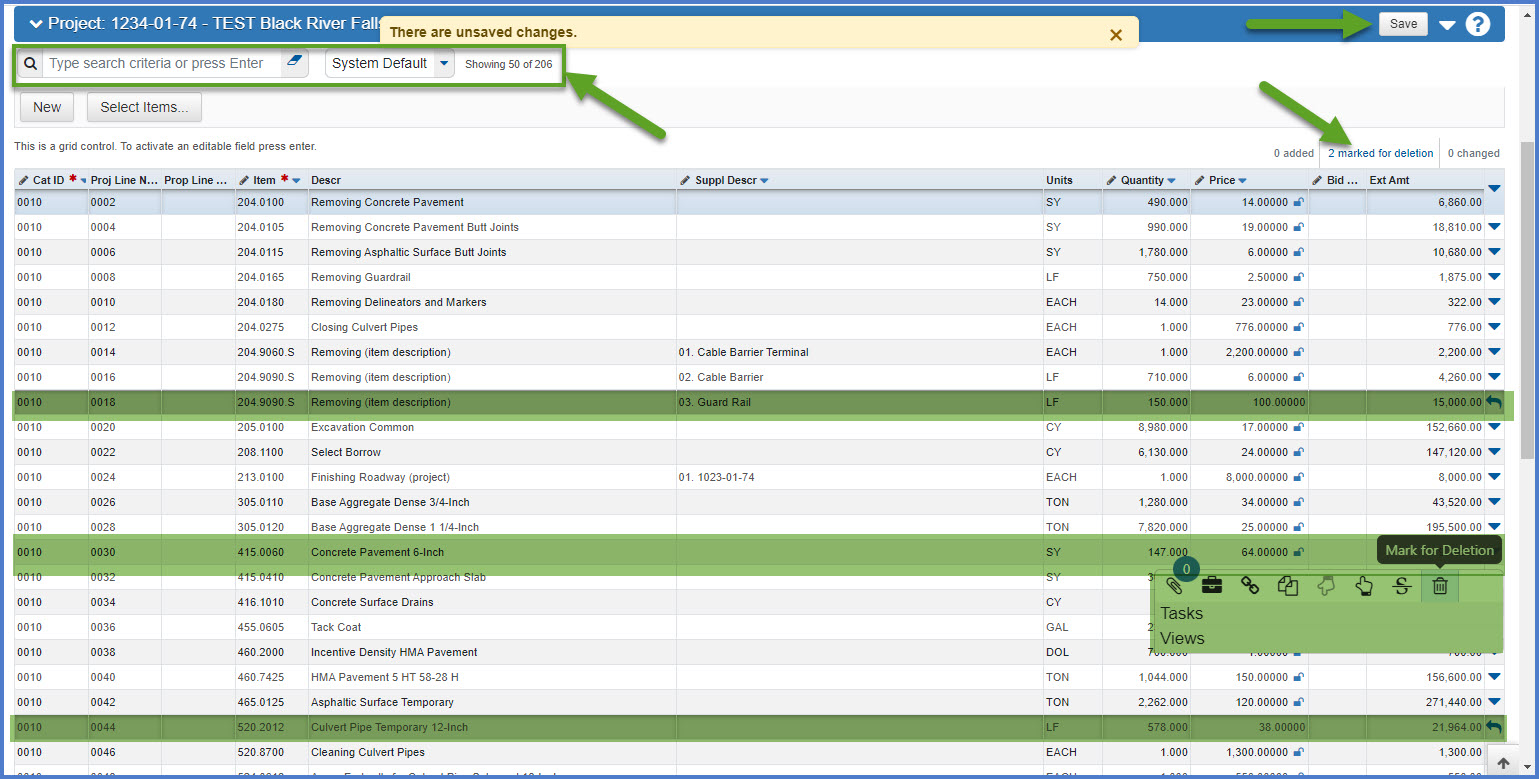
- Search by item ID or other criteria to narrow down the list of items. An advanced filter is also an option.
- Select Open Row Actions menu | Trashcan icon to mark an item for deletion. Repeat for each item to be deleted. The system tracks the items to be deleted.
- Click <Save>. The selected items will be deleted from the project.
Go to Item Pricing, the next step under Creating an Estimate in Preconstruction.