Reviewing and marking items complete
Last updated: 2023-03-28
Roles:
- Project Engineer and Project Manager = modify access
- Contract Specialist, Supervisor, Chief, ReadonlyConstr = read only access
Project staff must review and update all their items (in all projects and categories) at the completion of contract work. This includes noting any variation of items with quantities that are >=5% over or under authorized quantity. Project staff may also add additional comments for each item.
- Log into AASHTOWare Project.
- Select the Project Engineer (click the Expand Home action arrow | ProjectEngineer).
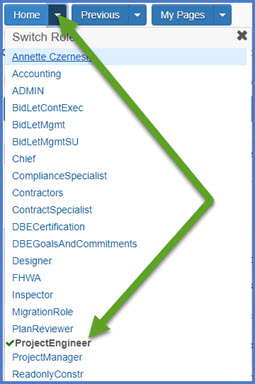
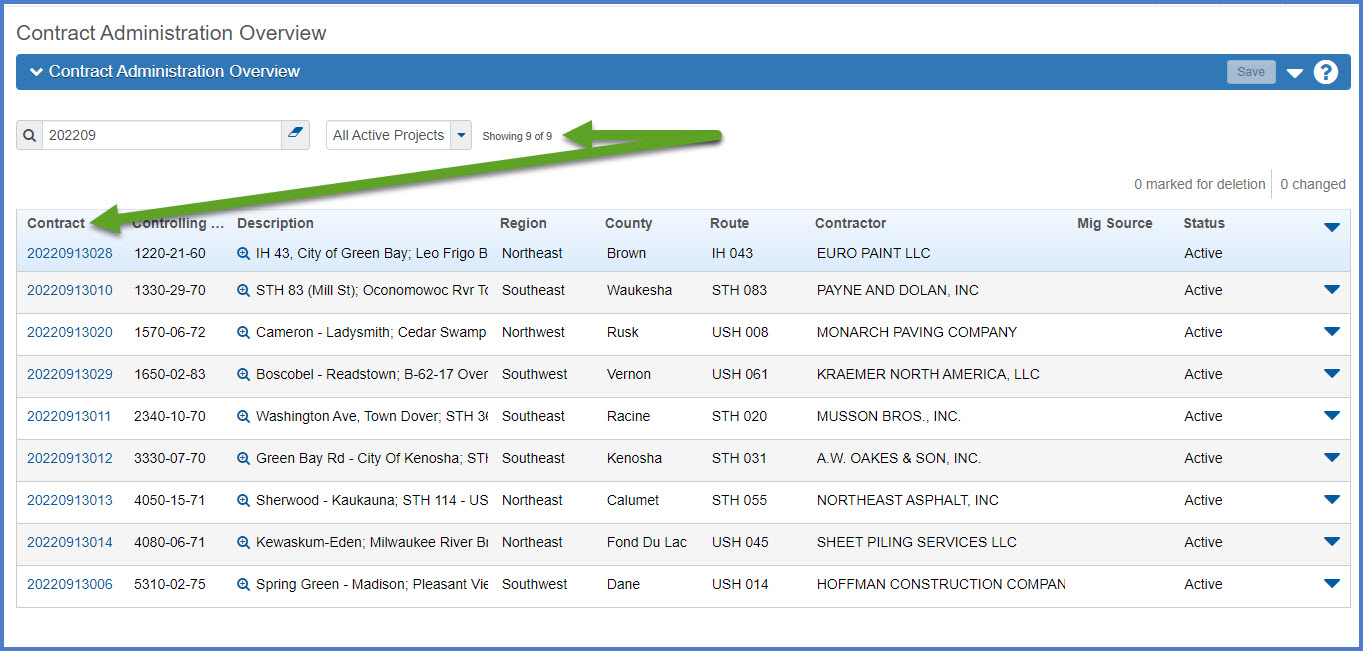
- Select the contract under Contract Administration Overview by clicking on the "Show first 10" hyperlink, by clicking enter, or by searching for the Contract ID or Contract Description in the search box.
Tip: Because the Controlling Project ID field is not a default search field, field staff will need to set a filter to search for their contract using this field. See Searching, Sorting and Filtering Lists for more details. Go to How to Search for the Contract ID by Project ID if only an associated project ID is known.
- Click on the contract ID hyperlink for the contract you are working on.
- Click the Items quick link located at the top of the screen.

Staff must note any variation of items with quantities that are >=5% over or under authorized quantity. It is recommended that the entry of the variation information take place as items are marked complete prior to sending the final estimate.
- Only 90 characters of the item comments field appear in the header record. Expand the item to see the entire item comments field.
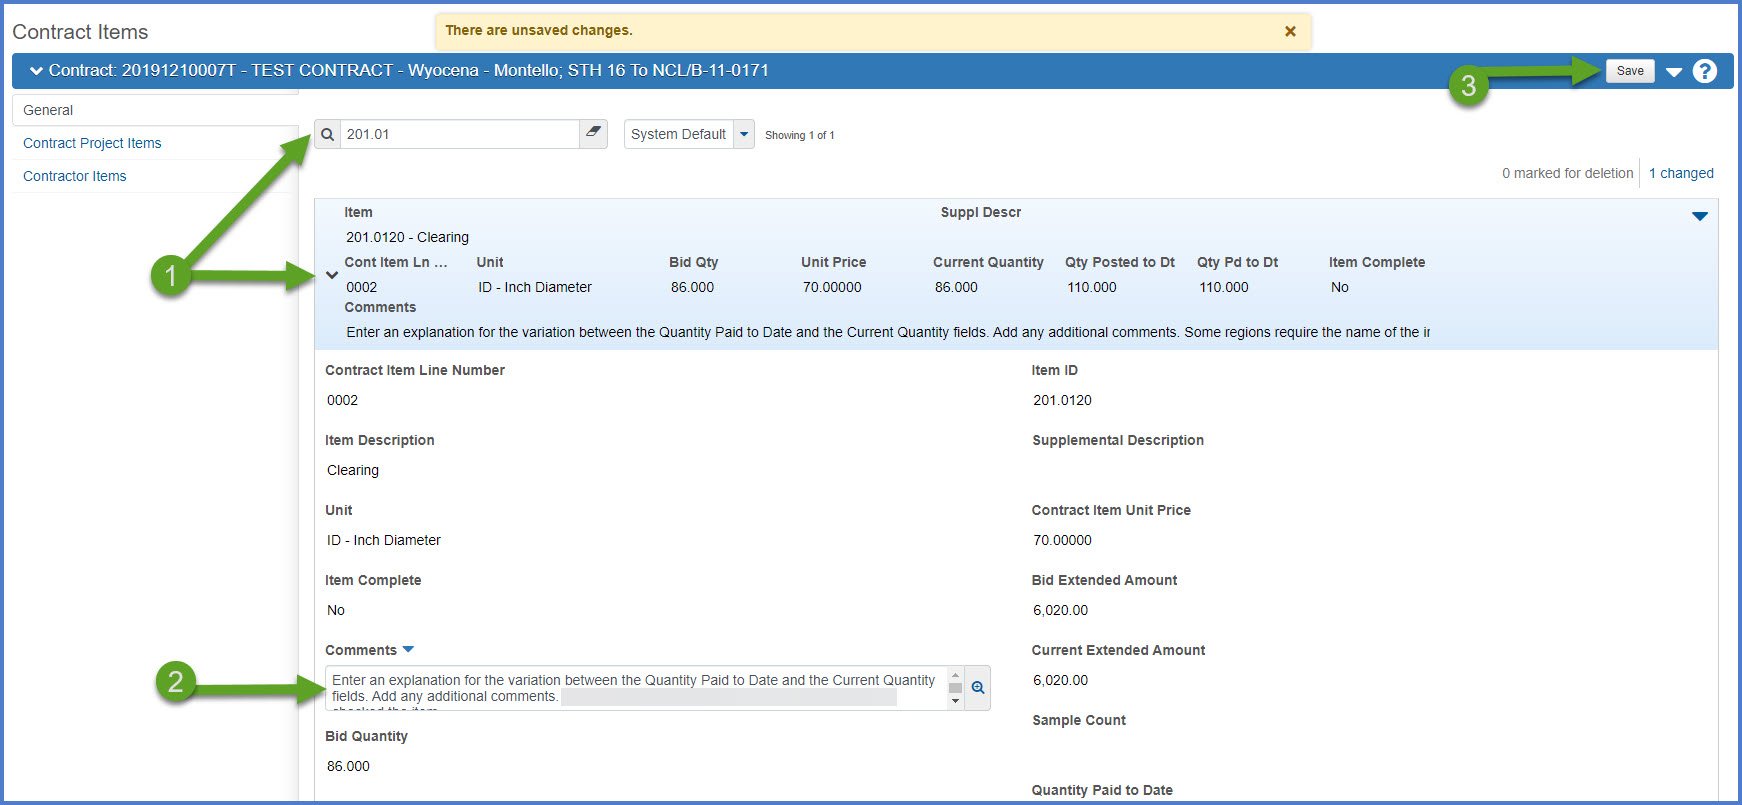
- When adding item comments, if you enter comments for several items and click <Save>, control goes back to the first item on the contract. Use the item search box to locate the next item to be updated by entering the contract item line number. Using the contract item line number may allow the user to eaily track where they are in the item review process.
- Search for and expand the item.
- Enter the following information in the Comments field:
- Enter an explanation for the variation between the Quantity Paid to Date and the Current Quantity fields. Any item not used on the project must include the reason why it was not used.
- Enter the date and initials of the individual who checked that all the posting quantities and remarks for the item are correct.
Examples:
Two additional trees (14" and 20" diameter) needed to be cleared and grubbed at Station 105+00 - 105+10, 36" RT because the majority of their roots would be damaged during grading operations.
All postings checked as of 10/15/2022 AMC - Click <Save>. Repeat for each item.
As part of the finals process, project staff are required to mark items complete. All items must be marked complete before the final payment estimate can be created and submitted for approval. Items can be marked complete individually or several at one time. Within the application, an item can be marked complete and later marked incomplete if item changes are required.
- From the Contract Items General tab, search for and select the item to be marked complete.
- The header record for each item will display the item ID, item description, supplemental description, contract item line number, unit, bid quantity, unit price, current quantity, quantity posted to date, quantity paid to date, item complete status, and item comments
- If the item comments appear, select the Row Actions Menu | Mark Item Complete. The process will run automatically. Review any warnings that may appear regarding item quantity postings to date.
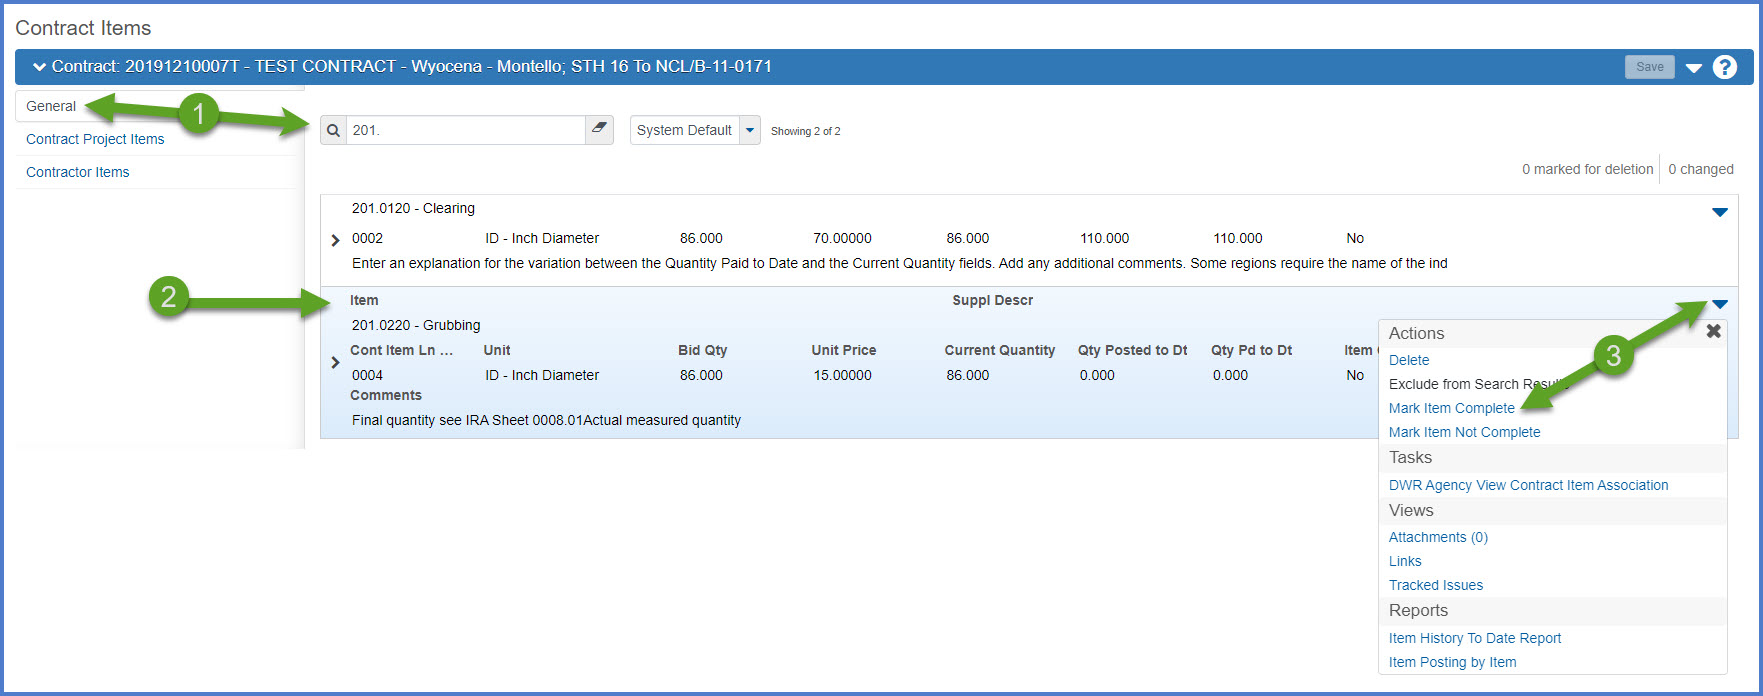
To mark an item not complete, repeat the steps above but select the Row Actions Menu | Mark Item Not Complete. The item row header will display an Item Complete Status of No.
- From the Contract Items General tab, select the Component Actions Menu | Mark Items Complete option.
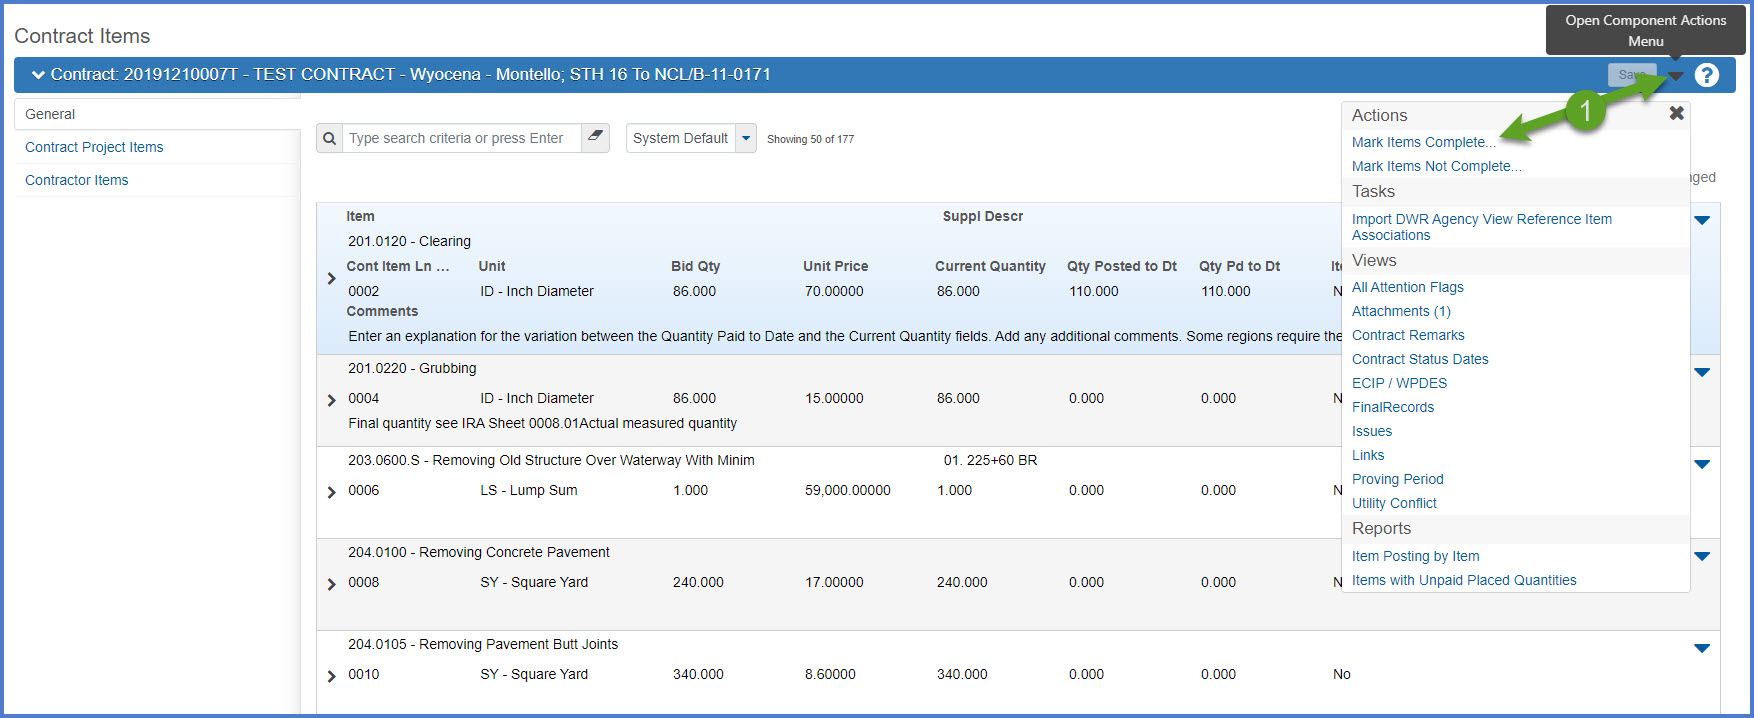
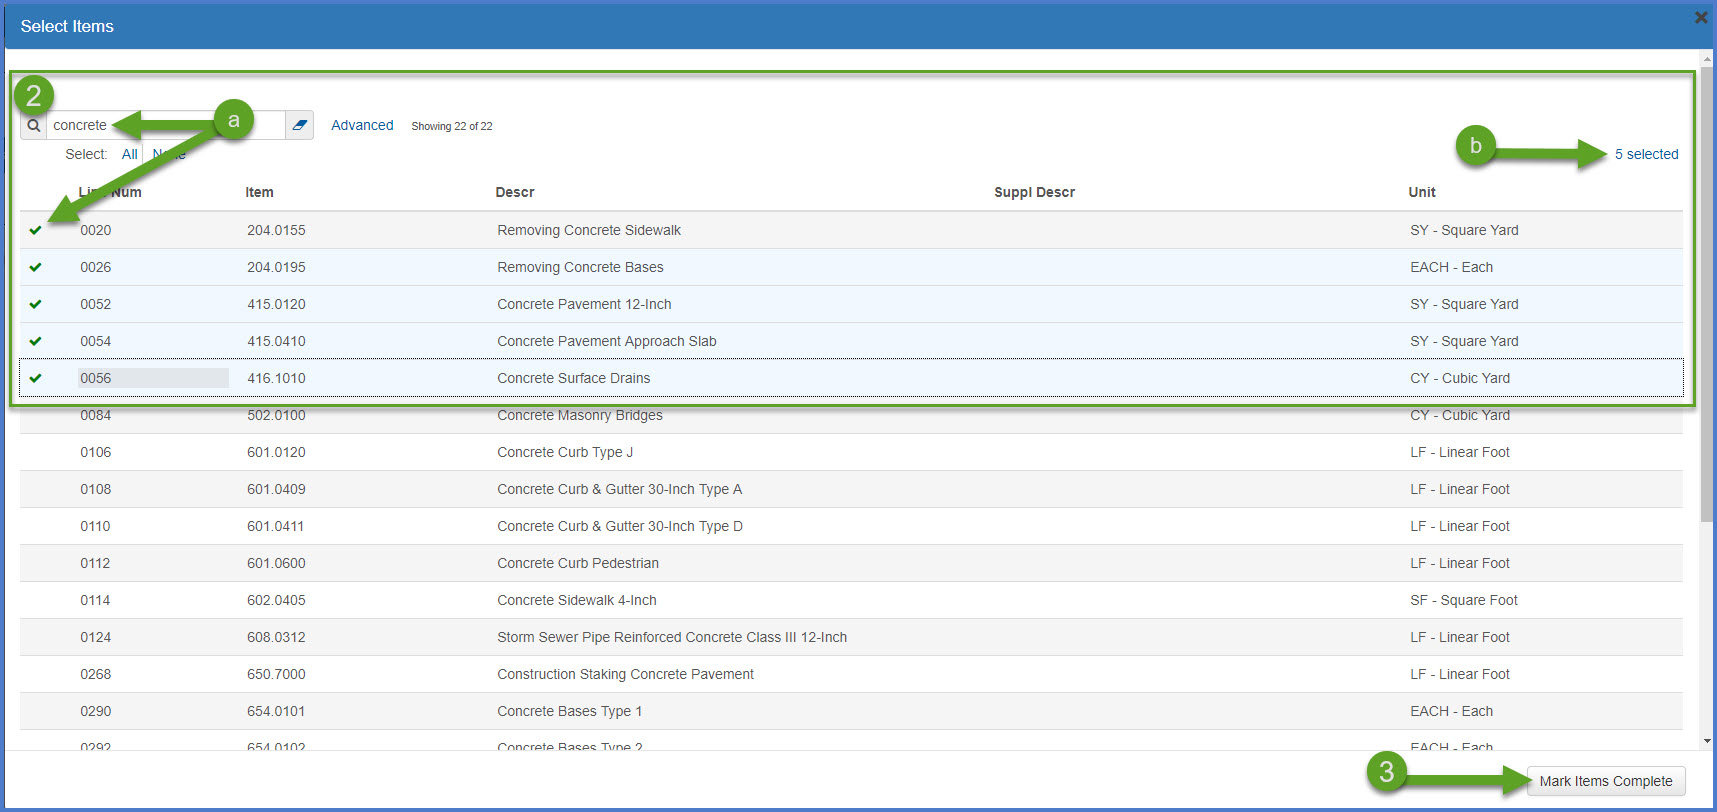
- On the Select Items component:
- Search for and select the items to be marked complete.
- A total number selected with appear in the upper right hand corner.
- Select <Mark Items Complete>. The selected items will be marked complete.
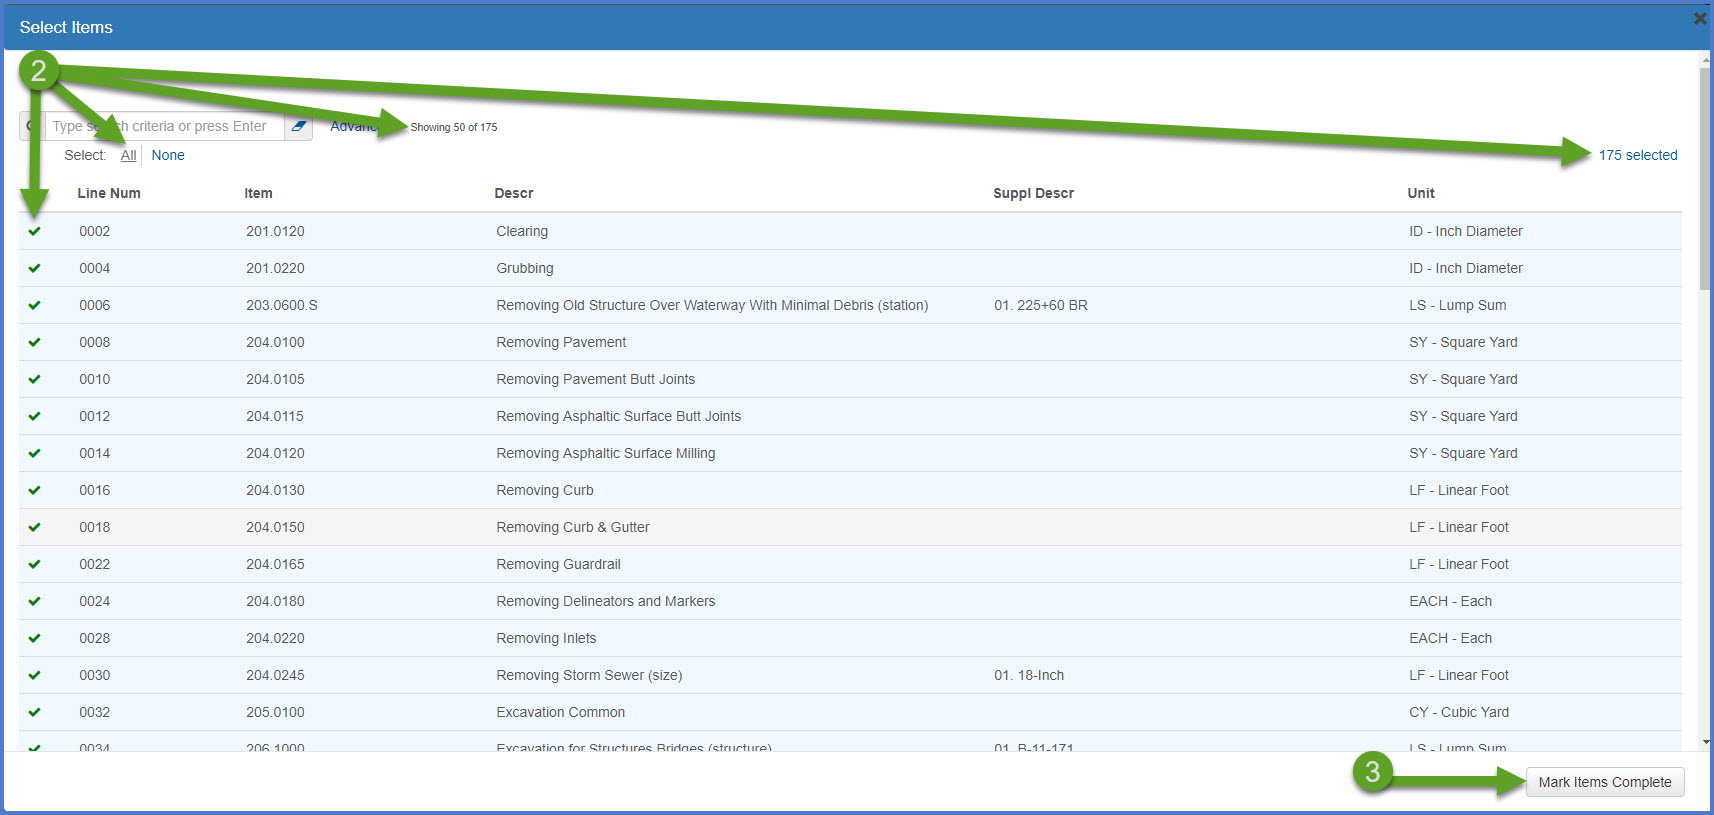
- From the Contract Items General tab, select the Component Actions Menu | Mark Items Complete option.

- On the Select Items component, select <All>. Confirm all contract items are selected.Warnings: If there are over 50 items on the contract, the user MUST select <Load next ##> until all items appear on the Select Items component. The total number of items selected should also reflect the total number of items on the contract.
- Select <Mark Items Complete>. All contract items will be marked complete.
- From the Contract Items General tab, select the Component Actions Menu | Mark Items Not Complete option.

- On the Select Items component, items previously marked as complete will appear. Complete one of the options below:
- Either select individual items to mark not complete
OR - Select <All> to mark all items not complete.
- Either select individual items to mark not complete
- Select <Mark Items Not Complete>. The selected items will be marked not complete.

Once the Project Engineer completes the item review and all the items are marked complete, the following reports should be created for finals records. The reports will default to PDF format and can be saved to the appropriate location for finals records. If the region requires a hard copy, they can be printed.
- From any component, select the Global Actions Menu | Generate Report.

- On the Generate Report component, select the Daily Diary Report.
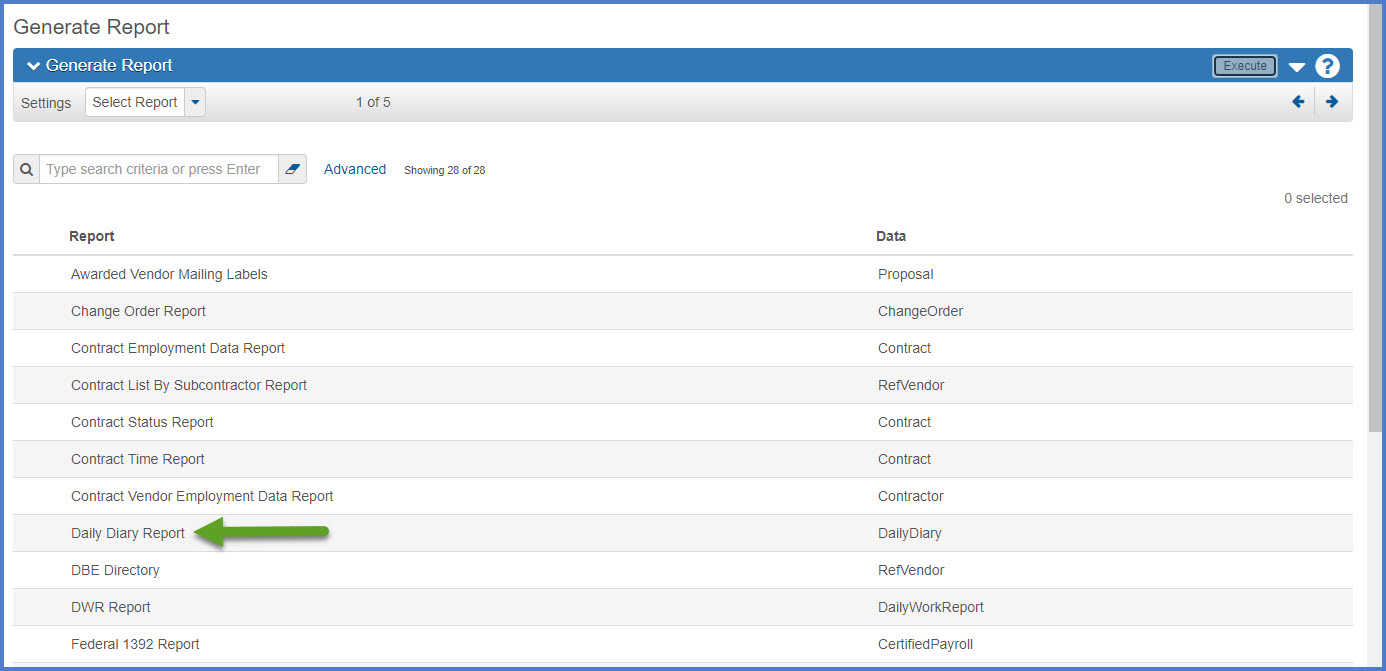
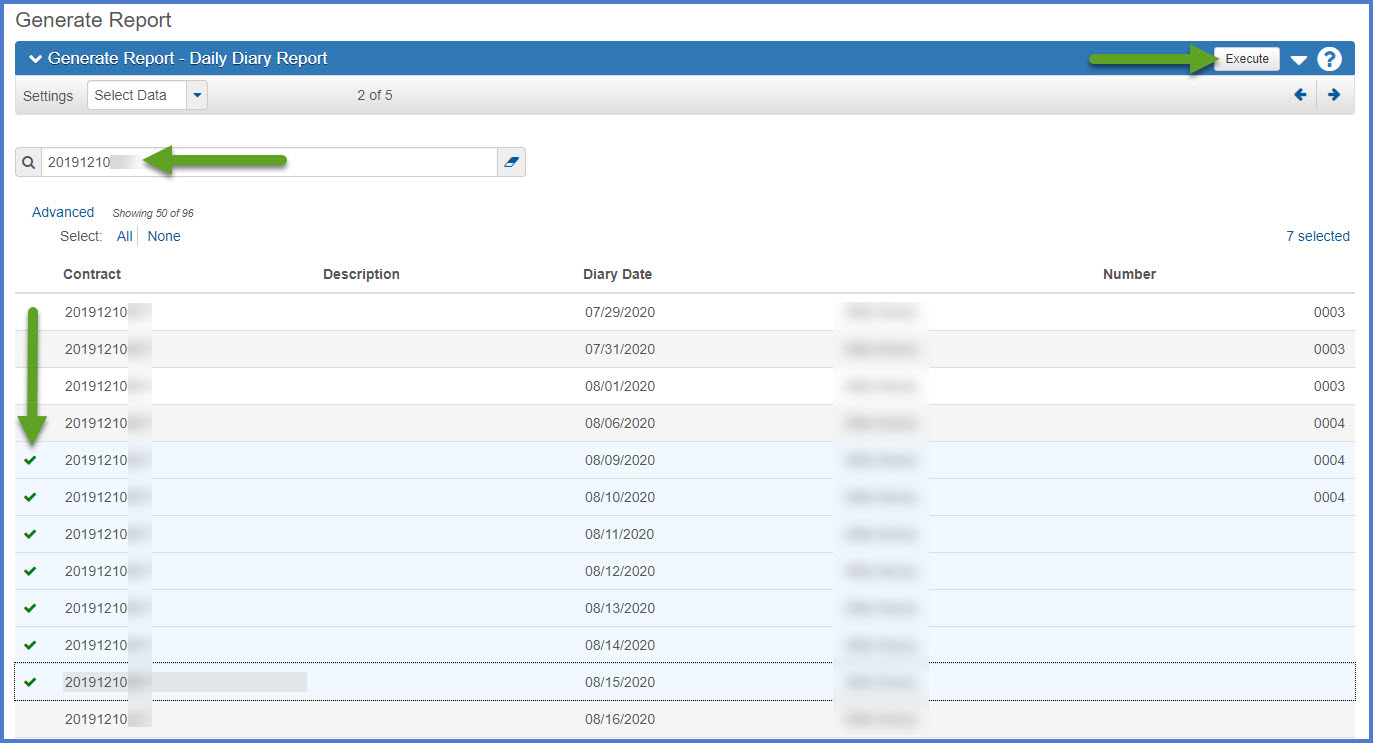
- When the report is selected, the Generate Report - Daily Diary Report | Select Data component will appear.
- Search for the contract ID.
- Select "All" to print all the diaries for this contract.
- Click <Execute>.
- The report will be generated and appear in a new browser tab. Print or save the report to the appropriate location for region finals.
- From any component, select the Global Actions Menu | Generate Report.

- On the Generate Report component, select the DWR Report.
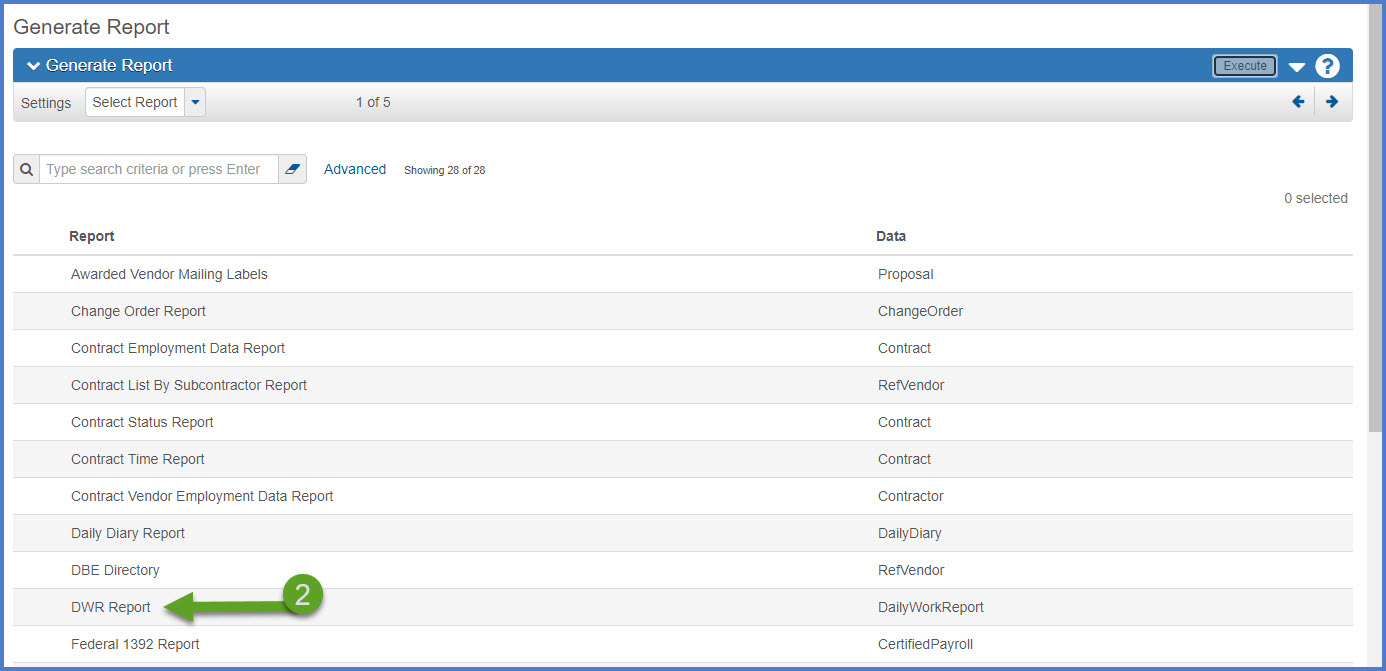
- When the report is selected, the Generate Report - DWR Report | Select Data component will appear.
- Search for the contract ID.
- Select "All" to print all the DWRs for this contract.
- Click <Execute>.


- The report will be generated. Print or save the report to the appropriate location for region finals.
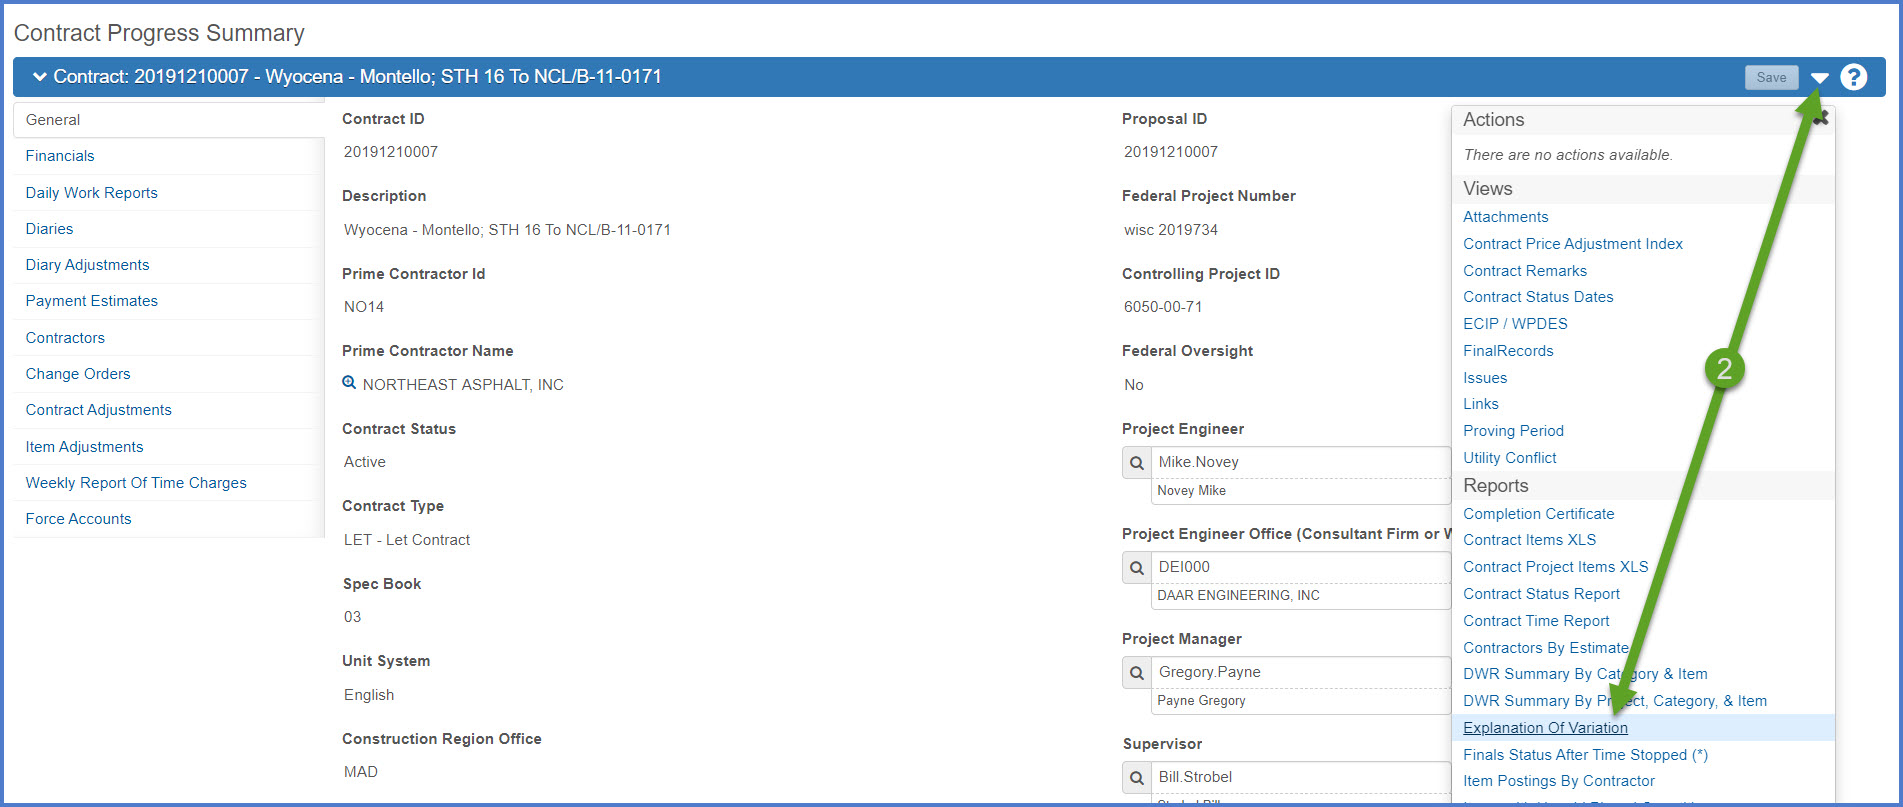
- Using the quick links, go to the Contract Administration or the Contract Progress component for the contract.
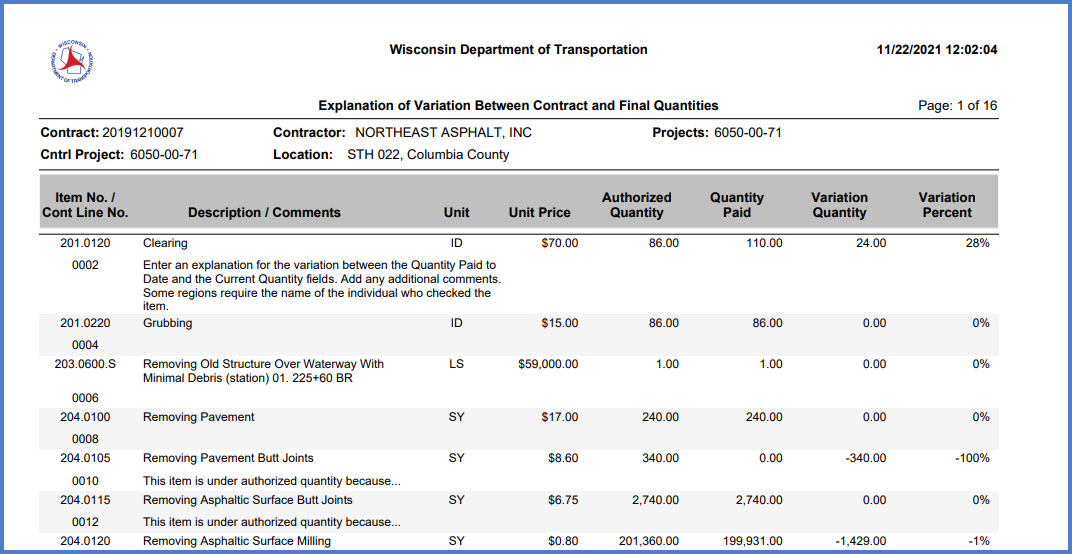
- Select the Component Action Menu | Reports | Explanation of Variation.
- On the Generate Report component, leave the default values:
- Output Type = Generate as PDF
- Report Layout Source = Custom to use the WisDOT custom report template
- Click <Execute> to generate the report.

- The report will open in a new browser tab. Print or save the report to the appropriate location for region finals.
- From the selected item row, select the Row Actions Menu | Reports | Item History To Date Report.
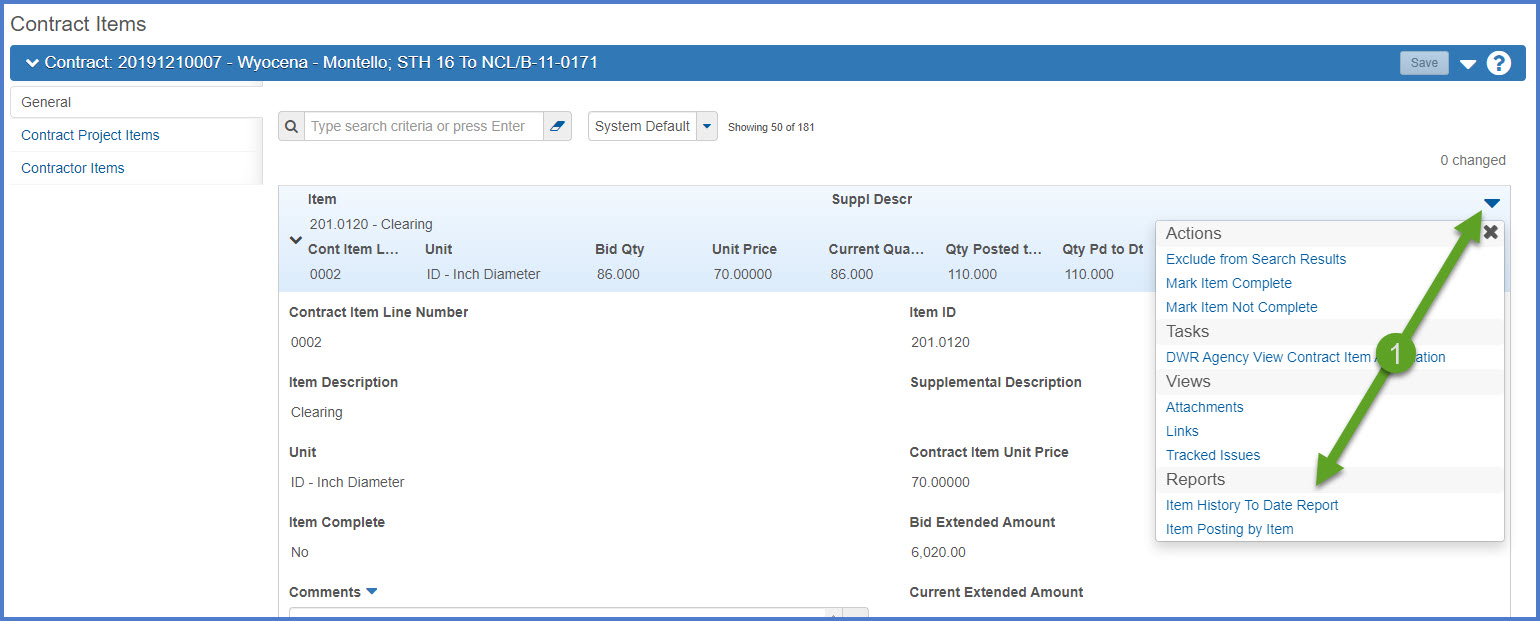
- On the Generate Report component, leave the defaults.
- Output Type = Generate as PDF
- Report Layout Source = Custom to use the WisDOT custom report template.
- Click <Execute> to generate the report.

- The report will open in a new browser tab. Print or save the report to the appropriate location for region finals.
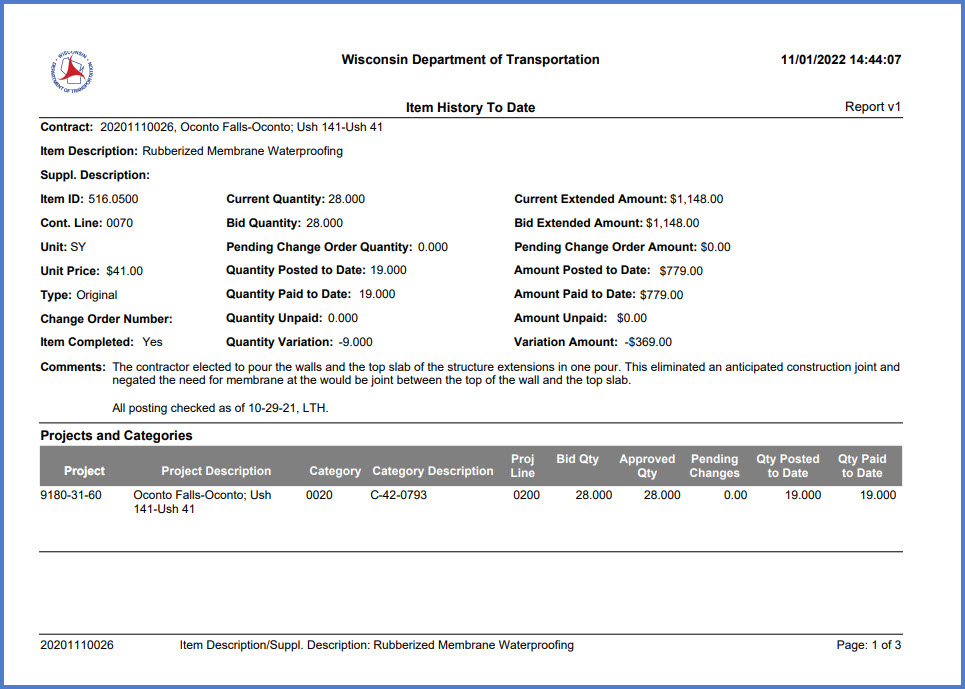
- From any component, select the Global Actions Menu | Generate Report.

- Search for and select the Item History to Date Report.
- The Generate Report - Item History to Date Report | Select Data component will appear. Search for the contract ID.
- Select "All" to print all the contract items.
- Click <Execute> to generate the report.
- The report will open in a new browser tab. Print or save the report to the appropriate location for region finals.